How Do You Fix Headphone Jack?
Headphone jacks are a common point of failure in many electronic devices, from smartphones to laptops. When your headphone jack stops working, it can be incredibly frustrating, especially if you rely on it for listening to music, making calls, or watching videos. Fortunately, there are several ways to troubleshoot and fix a malfunctioning headphone jack. In this article, we will explore various methods to diagnose and repair a faulty headphone jack, ensuring you can get back to enjoying your audio experience without interruption.
Understanding the Problem
Before diving into the solutions, it's essential to understand the common issues that can cause a headphone jack to malfunction. These issues can be broadly categorized into hardware and software problems.
Hardware Issues:
1. Debris and Dust: Over time, dust and debris can accumulate inside the headphone jack, preventing a proper connection.
2. Loose Connections: The internal connections of the headphone jack can become loose due to wear and tear or accidental damage.
3. Broken Jack: The headphone jack itself can break or become damaged, requiring replacement.
4. Faulty Headphones: Sometimes, the issue might not be with the jack but with the headphones themselves.
Software Issues:
1. Driver Problems: Outdated or corrupted audio drivers can cause the headphone jack to stop working.
2. Settings Misconfiguration: Incorrect audio settings can prevent sound from being routed through the headphone jack.
3. Operating System Bugs: Occasionally, bugs in the operating system can interfere with the headphone jack's functionality.
Step-by-Step Troubleshooting Guide
Step 1: Check the Headphones
Before assuming the problem lies with the headphone jack, test your headphones on another device. If they work fine, the issue is likely with the jack. If not, you may need to replace your headphones.
Step 2: Inspect and Clean the Jack
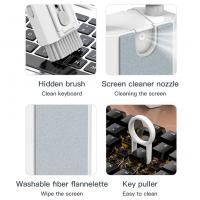
Use a flashlight to inspect the inside of the headphone jack for any visible debris or dust. If you see any, use a can of compressed air to blow it out. Alternatively, you can use a small, soft brush or a toothpick to gently remove any debris. Be careful not to damage the internal components.
Step 3: Test with Different Headphones
Sometimes, the problem might be specific to a particular pair of headphones. Try using a different set of headphones to see if the issue persists. If the new headphones work, the problem is likely with your original headphones.
Step 4: Check Audio Settings
Ensure that your device's audio settings are correctly configured. On a smartphone, go to the settings menu and check the sound settings. Make sure the headphone jack is selected as the output device. On a computer, right-click the sound icon in the taskbar, select "Playback devices," and ensure the headphones are set as the default device.
Step 5: Update or Reinstall Audio Drivers
Outdated or corrupted audio drivers can cause the headphone jack to malfunction. To update your drivers, go to the device manager, find the audio device, right-click, and select "Update driver." If updating doesn't work, try uninstalling the driver and then restarting your computer. The operating system should automatically reinstall the correct driver.
Step 6: Restart Your Device
Sometimes, a simple restart can resolve software-related issues. Restart your smartphone, tablet, or computer and check if the headphone jack starts working.
Step 7: Check for Operating System Updates
Ensure your device's operating system is up to date. Manufacturers often release updates that fix bugs and improve hardware compatibility. Go to the settings menu and check for any available updates.
Step 8: Use an External USB Sound Card
If the built-in headphone jack is beyond repair, consider using an external USB sound card. These devices are relatively inexpensive and can provide a quick workaround for a faulty headphone jack.
Advanced Repair Techniques
If the above steps do not resolve the issue, the problem might be more severe, requiring advanced repair techniques. These methods should only be attempted if you are comfortable with electronics and have the necessary tools.
Method 1: Soldering Loose Connections
If the internal connections of the headphone jack are loose, you may need to open the device and re-solder the connections. This process involves:
1. Opening the device carefully using the appropriate tools.
2. Locating the headphone jack and identifying the loose connections.
3. Using a soldering iron to re-solder the loose connections.
Method 2: Replacing the Headphone Jack
If the headphone jack is broken, you may need to replace it entirely. This process involves:
1. Purchasing a compatible replacement headphone jack.
2. Opening the device and locating the existing headphone jack.
3. Desoldering the old jack and soldering the new one in place.
Preventive Measures
To avoid future issues with your headphone jack, consider the following preventive measures:
1. Regular Cleaning: Periodically clean the headphone jack to prevent dust and debris buildup.
2. Gentle Handling: Avoid yanking or pulling on the headphone cable, as this can damage the jack.
3. Protective Cases: Use protective cases that cover the headphone jack when not in use.
4. Quality Headphones: Invest in high-quality headphones with durable connectors.
A malfunctioning headphone jack can be a significant inconvenience, but with the right approach, it is often a fixable problem. By following the troubleshooting steps outlined in this article, you can diagnose and repair common issues related to headphone jacks. Whether it's a simple cleaning or a more advanced repair, taking the time to address the problem can save you from the frustration of a non-functional audio port. Remember to handle your devices with care and take preventive measures to ensure the longevity of your headphone jack.






There are no comments for this blog.