How To Fix Headphone Jack On Android?
Fixing a headphone jack on an Android device can be a daunting task, especially if you rely heavily on your headphones for music, calls, or other audio needs. However, before you consider replacing your device or taking it to a professional for repair, there are several troubleshooting steps you can try on your own. This article will guide you through various methods to diagnose and potentially fix the issue with your headphone jack.
Understanding the Problem

The first step in fixing a headphone jack is to understand what might be causing the problem. Common issues include:
1. Debris in the Jack: Dust, lint, or other debris can accumulate in the headphone jack, preventing a proper connection.
2. Software Issues: Sometimes, the problem might be due to a software glitch or an outdated operating system.
3. Hardware Damage: Physical damage to the headphone jack or internal components can also cause issues.
4. Faulty Headphones: The problem might not be with your device but with the headphones themselves.
Initial Troubleshooting Steps
1. Check the Headphones
Before diving into more complex solutions, ensure that the problem is not with your headphones. Test them on another device to see if they work. If they don’t, you might need to replace your headphones.
2. Clean the Headphone Jack
One of the most common issues is debris in the headphone jack. Here’s how to clean it:
- Turn off your device: This is a safety precaution to avoid any short circuits.
- Use a flashlight: Shine a light into the headphone jack to see if there is any visible debris.
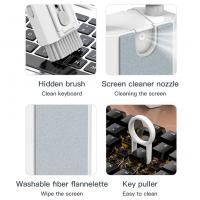
- Use a toothpick or a small brush: Gently insert a toothpick or a small brush into the jack to remove any debris. Be very careful not to damage the internal components.
- Compressed air: You can also use a can of compressed air to blow out any dust or lint.
3. Restart Your Device
Sometimes, a simple restart can fix software glitches that might be causing the issue. Turn off your device, wait for a few seconds, and then turn it back on.
Advanced Troubleshooting Steps
If the initial steps didn’t resolve the issue, you might need to try more advanced troubleshooting methods.
1. Check for Software Updates
An outdated operating system can sometimes cause issues with hardware components. Check if there are any available updates for your device:
- Go to Settings: Open the Settings app on your device.
- Software Update: Navigate to the Software Update section and check for updates.
- Install Updates: If there are any updates available, install them and restart your device.
2. Safe Mode
Booting your device in Safe Mode can help you determine if a third-party app is causing the issue. Here’s how to do it:
- Press and hold the power button: When the power options appear, press and hold the "Power off" option.
- Safe Mode: A prompt will appear asking if you want to reboot into Safe Mode. Confirm this action.
- Test the headphone jack: Once in Safe Mode, test the headphone jack. If it works, a third-party app is likely causing the issue. You’ll need to identify and uninstall the problematic app.
3. Reset App Preferences
Sometimes, resetting app preferences can resolve conflicts that might be causing the headphone jack to malfunction:
- Go to Settings: Open the Settings app on your device.
- Apps: Navigate to the Apps section.
- Reset App Preferences: Tap on the three-dot menu icon and select "Reset app preferences."
4. Factory Reset
If none of the above methods work, you might need to perform a factory reset. This will erase all data on your device, so make sure to back up important information:
- Go to Settings: Open the Settings app on your device.
- System: Navigate to the System section.
- Reset: Select "Reset" and then "Factory data reset."
- Confirm: Follow the on-screen instructions to complete the reset.
When to Seek Professional Help
If you’ve tried all the above methods and your headphone jack still isn’t working, it might be time to seek professional help. The issue could be due to hardware damage that requires specialized tools and expertise to fix. Contact your device’s manufacturer or a certified repair technician for assistance.
Preventive Measures
To avoid future issues with your headphone jack, consider the following preventive measures:
- Use a case: A good quality case can protect your device from physical damage.
- Keep it clean: Regularly clean the headphone jack to prevent debris buildup.
- Avoid moisture: Keep your device away from water and other liquids.
- Use quality headphones: Invest in good quality headphones that are less likely to cause damage to the jack.
Fixing a headphone jack on an Android device can range from a simple cleaning to more complex troubleshooting steps. By following the methods outlined in this article, you can diagnose and potentially fix the issue on your own. However, if the problem persists, don’t hesitate to seek professional help. Taking preventive measures can also help you avoid similar issues in the future, ensuring that your device remains in good working condition.


