How To Format Micro Sd Memory Card?
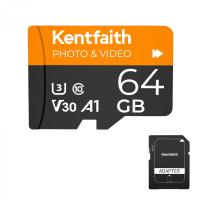
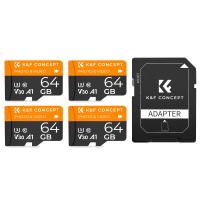
Formatting a micro SD memory card is a common task that many users need to perform for various reasons, such as preparing the card for use in a new device, clearing data, or resolving file system errors. This article will guide you through the process of formatting a micro SD memory card, covering different methods and providing practical tips to ensure a smooth and successful operation.
Understanding the Basics of Formatting

Before diving into the steps, it's essential to understand what formatting a micro SD card entails. Formatting is the process of preparing a storage device, such as a micro SD card, for use by an operating system. It involves setting up a file system that the device can recognize and use to store and retrieve data. Common file systems include FAT32, exFAT, and NTFS.
Why Format a Micro SD Card?

There are several reasons why you might need to format a micro SD card:
1. New Card Preparation: New micro SD cards often come pre-formatted, but you may want to reformat them to ensure compatibility with your device.
2. Clearing Data: Formatting is an efficient way to erase all data on the card, making it ready for new files.
3. Fixing Errors: If your micro SD card is experiencing file system errors or corruption, formatting can often resolve these issues.
4. Changing File System: Different devices may require different file systems. For example, some cameras prefer FAT32, while others may work better with exFAT.
Methods to Format a Micro SD Card

There are several methods to format a micro SD card, depending on the device and operating system you are using. Here, we will cover formatting on Windows, macOS, Android, and using a camera.
Formatting on Windows

1. Insert the Micro SD Card: Use an SD card adapter if necessary and insert the micro SD card into your computer's card reader.
2. Open File Explorer: Press `Win + E` to open File Explorer and locate the micro SD card under "This PC" or "My Computer."
3. Right-Click and Select Format: Right-click on the micro SD card and select "Format" from the context menu.
4. Choose File System: In the Format window, choose the desired file system (FAT32, exFAT, or NTFS). For most purposes, FAT32 or exFAT is recommended.
5. Start Formatting: Click "Start" to begin the formatting process. A warning will appear, notifying you that all data will be erased. Confirm to proceed.
6. Completion: Once the process is complete, a notification will appear. Your micro SD card is now formatted and ready for use.
Formatting on macOS
1. Insert the Micro SD Card: Use an SD card adapter if necessary and insert the micro SD card into your Mac's card reader.
2. Open Disk Utility: Go to `Applications > Utilities > Disk Utility`.
3. Select the Micro SD Card: In Disk Utility, select the micro SD card from the list of drives on the left.
4. Erase the Card: Click the "Erase" button at the top of the window.
5. Choose Format: In the Erase window, choose the desired file system (usually MS-DOS (FAT) for FAT32 or ExFAT for exFAT).
6. Name the Card: Optionally, you can give the card a name.
7. Erase: Click "Erase" to begin the formatting process. Once complete, your micro SD card will be formatted and ready for use.
Formatting on Android
1. Insert the Micro SD Card: Insert the micro SD card into your Android device.
2. Open Settings: Go to the device's Settings menu.
3. Storage: Navigate to the "Storage" section.
4. Select the Micro SD Card: Find and select the micro SD card.
5. Format: Tap on "Format" or "Format SD card." Confirm the action when prompted.
6. Completion: The device will format the card, and it will be ready for use once the process is complete.
Formatting Using a Camera
1. Insert the Micro SD Card: Insert the micro SD card into your camera.
2. Access Menu: Turn on the camera and access the menu.
3. Find Format Option: Navigate to the settings or setup menu and find the "Format" option.
4. Select Format: Select the "Format" option and confirm when prompted.
5. Completion: The camera will format the card, and it will be ready for use once the process is complete.
Tips for Formatting Micro SD Cards
1. Backup Data: Always back up any important data before formatting, as the process will erase all files on the card.
2. Choose the Right File System: Ensure you select the appropriate file system for your device. FAT32 is widely compatible but has a 4GB file size limit. exFAT supports larger files and is suitable for newer devices.
3. Use Reliable Tools: Use the built-in formatting tools provided by your operating system or device to avoid compatibility issues.
4. Check for Errors: If you encounter errors during formatting, try using a different card reader or device to rule out hardware issues.
Troubleshooting Common Issues
1. Card Not Recognized: If your micro SD card is not recognized by your device, try using a different card reader or adapter. Ensure the card is properly inserted.
2. Formatting Errors: If you receive an error message during formatting, try using a different method or device. You can also use third-party software like SD Formatter for more advanced options.
3. Data Recovery: If you accidentally format a card with important data, stop using the card immediately and use data recovery software to attempt to retrieve the lost files.
Formatting a micro SD memory card is a straightforward process that can be accomplished using various methods depending on your device and operating system. Whether you're preparing a new card, clearing data, or resolving errors, following the steps outlined in this article will help ensure a successful format. Always remember to back up important data and choose the appropriate file system for your needs. With these tips and guidelines, you'll be able to format your micro SD card with confidence and ease.


