How To Format Sd Card For Trail Camera?
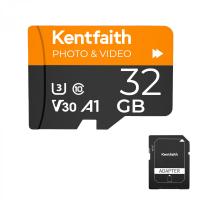
When it comes to using a trail camera, one of the most crucial steps is ensuring that your SD card is properly formatted. A well-formatted SD card ensures that your trail camera operates smoothly, captures images and videos effectively, and stores data without errors. In this article, we will delve into the step-by-step process of formatting an SD card for a trail camera, discuss the importance of proper formatting, and address common issues that users may encounter.
Understanding the Importance of Formatting
Before we dive into the how-to, it's essential to understand why formatting an SD card is necessary. Formatting an SD card prepares it for use by erasing all existing data and setting up a file system that the trail camera can read and write to efficiently. This process helps in:
1. Preventing Data Corruption: Proper formatting reduces the risk of data corruption, which can result in lost images or videos.
2. Optimizing Performance: A formatted SD card ensures that the camera can write data quickly and efficiently, which is crucial for capturing high-resolution images and videos.
3. Maximizing Storage Space: Formatting removes any residual data or hidden files that may take up space, ensuring you have the maximum available storage.
4. Ensuring Compatibility: Different devices may use different file systems. Formatting the SD card in the trail camera ensures that the card is compatible with the camera's requirements.
Step-by-Step Guide to Formatting an SD Card for a Trail Camera
Step 1: Backup Your Data
Before formatting your SD card, it's crucial to back up any existing data that you want to keep. Formatting will erase all data on the card, so transfer any important files to your computer or another storage device.
Step 2: Insert the SD Card into Your Computer
To format the SD card, you will need to insert it into your computer. Most computers have an SD card slot, but if yours does not, you can use an external SD card reader.
Step 3: Open the Formatting Tool
The process of formatting an SD card can vary slightly depending on your operating system:
- Windows:
1. Open "File Explorer" and locate the SD card under "This PC" or "My Computer."
2. Right-click on the SD card and select "Format."
3. A new window will open with formatting options.
- Mac:
1. Open "Disk Utility" from the Applications > Utilities folder.
2. Select the SD card from the list of drives on the left.
3. Click the "Erase" button at the top of the window.
Step 4: Choose the File System
For most trail cameras, the recommended file system is FAT32 or exFAT. FAT32 is widely compatible with many devices, but it has a file size limit of 4GB. If you plan to record long videos or use high-capacity SD cards (64GB or larger), exFAT is a better choice as it supports larger file sizes.
- Windows:
1. In the Format window, select either "FAT32" or "exFAT" from the "File system" dropdown menu.
2. You can also choose to give the SD card a name by entering it in the "Volume label" field.
- Mac:
1. In the Erase window, select either "MS-DOS (FAT)" for FAT32 or "ExFAT" for exFAT from the "Format" dropdown menu.
2. You can also name the SD card in the "Name" field.
Step 5: Start the Formatting Process
- Windows:
1. Click "Start" to begin the formatting process.
2. A warning will appear, informing you that all data will be erased. Confirm by clicking "OK."
- Mac:
1. Click "Erase" to start the formatting process.
2. Confirm the action when prompted.
Step 6: Safely Eject the SD Card
Once the formatting process is complete, safely eject the SD card from your computer. On Windows, right-click the SD card and select "Eject." On Mac, click the eject icon next to the SD card in the Finder sidebar.
Step 7: Insert the SD Card into Your Trail Camera
Now that your SD card is formatted, insert it into your trail camera. Turn on the camera and check the settings to ensure that the card is recognized and ready for use.
Common Issues and Troubleshooting
Even with careful formatting, you may encounter some issues with your SD card. Here are some common problems and their solutions:
1. SD Card Not Recognized: If your trail camera does not recognize the SD card, try reformatting it using the camera's built-in formatting option, if available. This ensures compatibility with the camera's file system requirements.
2. Error Messages: If you receive error messages such as "Card Error" or "Card Locked," check the write-protect switch on the side of the SD card. Ensure it is in the unlocked position. If the problem persists, try using a different SD card to determine if the issue is with the card or the camera.
3. Slow Performance: If your trail camera is slow to write data to the SD card, consider using a high-speed card (Class 10 or UHS-I/UHS-II). These cards are designed for faster data transfer rates, which can improve the camera's performance.
4. Data Corruption: If you experience frequent data corruption, it may be due to a faulty SD card. Try using a different card and see if the problem persists. Additionally, avoid removing the SD card while the camera is still writing data, as this can cause corruption.
Best Practices for Maintaining Your SD Card
To ensure the longevity and reliability of your SD card, follow these best practices:
1. Regularly Format the Card: Periodically format the SD card to keep it in optimal condition. This helps prevent data corruption and ensures efficient performance.
2. Use High-Quality Cards: Invest in high-quality SD cards from reputable brands. These cards are more reliable and less prone to failure.
3. Avoid Extreme Conditions: SD cards can be sensitive to extreme temperatures, moisture, and physical damage. Store and use them in appropriate conditions to prevent damage.
4. Safely Eject the Card: Always safely eject the SD card from your computer and trail camera to avoid data corruption.
5. Keep Backup Copies: Regularly back up important data from your SD card to another storage device to prevent data loss.
Formatting an SD card for your trail camera is a straightforward process that can significantly impact the performance and reliability of your camera. By following the steps outlined in this article, you can ensure that your SD card is properly formatted and ready for use. Additionally, by adhering to best practices for maintaining your SD card, you can extend its lifespan and avoid common issues. Whether you're a seasoned wildlife photographer or a casual outdoor enthusiast, a well-formatted SD card is essential for capturing those perfect moments in nature.

