How To Hold Microphone?
Mastering the Art of Holding a Microphone: A Comprehensive Guide
In the world of public speaking, live performances, and broadcasting, the microphone is an indispensable tool. However, the way you hold a microphone can significantly impact the quality of your sound and the effectiveness of your communication. Whether you are a seasoned professional or a novice, understanding the nuances of microphone handling can elevate your performance and ensure that your message is delivered clearly and effectively. This article will delve into the various aspects of holding a microphone, addressing common issues and providing practical solutions.
Understanding Microphone Types

Before diving into the techniques of holding a microphone, it is essential to understand the different types of microphones and their specific handling requirements. The most common types include:
1. Dynamic Microphones: These are robust and versatile, often used in live performances. They are less sensitive to handling noise but require close proximity to capture clear sound.
2. Condenser Microphones: These are more sensitive and are typically used in studio settings. They capture a broader range of frequencies but are more susceptible to handling noise.
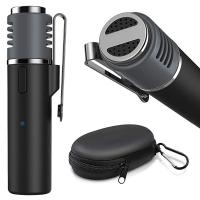
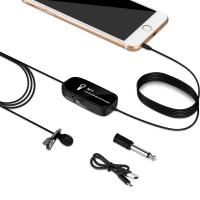
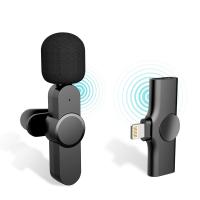
3. Lavalier Microphones: These are small, clip-on microphones used in presentations and broadcasting. They allow for hands-free operation but require careful placement.
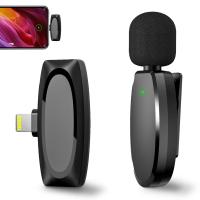
4. Wireless Handheld Microphones: These offer mobility and are commonly used in live events. They combine the features of dynamic and condenser microphones but require careful handling to avoid interference.
The Basics of Holding a Microphone

Regardless of the type of microphone, certain fundamental principles apply to all:
1. Grip: Hold the microphone firmly but not too tightly. A relaxed grip reduces handling noise and allows for better control.
2. Positioning: Keep the microphone at an appropriate distance from your mouth. For dynamic microphones, this is usually 2-4 inches. For condenser microphones, a slightly greater distance may be required.
3. Angle: Hold the microphone at a slight angle (about 45 degrees) to avoid plosive sounds (like 'p' and 'b' sounds) and to capture a more natural tone.
4. Movement: Avoid unnecessary movements. If you need to move, do so smoothly to prevent abrupt changes in sound quality.
Addressing Common Issues

Handling Noise

Handling noise is the unwanted sound that occurs when the microphone is moved or touched. To minimize this:
- Use a shock mount or microphone stand whenever possible.
- Hold the microphone by the handle, not the grille.
- Use a windscreen or pop filter to reduce noise from breath and plosives.
Feedback
Feedback is the high-pitched squeal that occurs when the microphone picks up sound from the speakers. To prevent feedback:
- Keep the microphone pointed away from the speakers.
- Adjust the microphone's gain and the speaker's volume appropriately.
- Use directional microphones to focus on the sound source and reject background noise.
Proximity Effect
The proximity effect is the increase in bass frequencies when the microphone is very close to the sound source. To manage this:
- Maintain a consistent distance from the microphone.
- Use equalization (EQ) to balance the sound if necessary.
- Practice proper microphone technique to avoid excessive bass.
Advanced Techniques
Vocal Techniques
For singers and speakers, mastering vocal techniques can enhance microphone performance:
- Breath Control: Proper breath control ensures consistent volume and reduces the risk of running out of breath mid-sentence or note.
- Articulation: Clear articulation helps in delivering the message effectively. Practice enunciating words clearly.
- Dynamic Range: Control your dynamic range by adjusting your volume and intensity according to the content. This prevents distortion and maintains clarity.
Stage Presence
For live performers, stage presence is crucial:
- Movement: Use the microphone to enhance your stage presence. Move it closer for intimate moments and farther away for powerful sections.
- Interaction: Engage with the audience by making eye contact and using the microphone to direct your voice towards different sections of the audience.
- Confidence: Hold the microphone with confidence. Your body language can influence how your message is received.
Practical Tips for Different Scenarios
Public Speaking
For public speakers, clarity and engagement are key:
- Use a microphone stand to keep your hands free for gestures.
- Position the microphone at chest level and angle it towards your mouth.
- Practice speaking with the microphone to find the optimal distance and angle.
Singing
For singers, the quality of sound is paramount:
- Use in-ear monitors to hear yourself clearly and adjust your technique accordingly.
- Experiment with different microphone positions to find the best sound for your voice.
- Practice holding the microphone at different angles to discover how it affects your tone.
Broadcasting
For broadcasters, consistency and professionalism are essential:
- Use a pop filter to reduce plosive sounds.
- Position the microphone at a consistent distance from your mouth.
- Monitor your sound levels to ensure consistent volume and clarity.
Holding a microphone may seem straightforward, but mastering the art requires understanding, practice, and attention to detail. By following the principles outlined in this article, you can improve your microphone technique, enhance your performance, and ensure that your message is delivered clearly and effectively. Whether you are speaking, singing, or broadcasting, the way you hold a microphone can make a significant difference in the quality of your sound and the impact of your communication. So, take the time to practice and refine your technique, and you will see the benefits in your performances and presentations.






There are no comments for this blog.