How To Install Your Own Solar Panels?
Installing your own solar panels can be a rewarding and cost-effective way to harness renewable energy for your home. This comprehensive guide will walk you through the process, from understanding the basics to the final installation. By the end of this article, you should have a clear understanding of the steps involved and the considerations to keep in mind.
Understanding Solar Panels
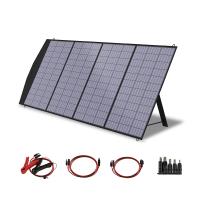
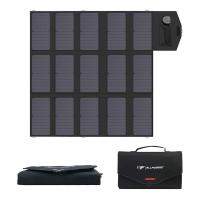
Before diving into the installation process, it's essential to understand what solar panels are and how they work. Solar panels, also known as photovoltaic (PV) panels, convert sunlight into electricity. They are made up of many solar cells, which are typically made from silicon. When sunlight hits these cells, it knocks electrons loose, creating an electric current.
Assessing Your Home's Solar Potential
The first step in installing solar panels is to assess your home's solar potential. This involves evaluating several factors:
1. Sunlight Exposure: Determine how much sunlight your roof receives throughout the day. South-facing roofs are ideal in the Northern Hemisphere, while north-facing roofs are better in the Southern Hemisphere. Use tools like solar pathfinders or online solar calculators to estimate your solar potential.
2. Roof Condition: Ensure your roof is in good condition and can support the weight of solar panels. If your roof needs repairs or replacement, it's best to address these issues before installing solar panels.
3. Local Regulations: Check local building codes and regulations. Some areas have specific requirements for solar panel installations, including permits and inspections.
Designing Your Solar System

Once you've determined that your home is suitable for solar panels, the next step is to design your solar system. This involves several key decisions:
1. System Size: Calculate your energy needs to determine the size of the solar system you need. Review your electricity bills to understand your average monthly consumption. A typical home solar system ranges from 3 kW to 10 kW.
2. Panel Type: Choose the type of solar panels you want to install. The most common types are monocrystalline, polycrystalline, and thin-film panels. Monocrystalline panels are the most efficient but also the most expensive. Polycrystalline panels are less efficient but more affordable. Thin-film panels are the least efficient but can be flexible and lightweight.
3. Inverter Type: Decide on the type of inverter you need. Inverters convert the DC electricity generated by the panels into AC electricity used by your home. There are three main types: string inverters, microinverters, and power optimizers. Microinverters and power optimizers are more efficient but also more expensive.
4. Mounting System: Choose a mounting system that suits your roof type. Common options include roof-mounted racks, ground-mounted racks, and pole mounts.
Purchasing Your Solar Equipment
With your system design in hand, it's time to purchase your solar equipment. You can buy solar panels, inverters, and mounting systems from various suppliers. Look for reputable brands and check for warranties. Many solar panels come with a 25-year warranty, while inverters typically have a 10-year warranty.
Installing the Solar Panels
Now comes the most critical part: installing the solar panels. This process involves several steps:
1. Mounting the Racks: Install the mounting racks on your roof. Ensure they are securely attached to the roof structure. Use a level to make sure the racks are even.
2. Installing the Panels: Attach the solar panels to the mounting racks. Follow the manufacturer's instructions for securing the panels. Make sure they are tightly fastened to withstand wind and weather conditions.
3. Wiring the Panels: Connect the solar panels to each other using the provided wiring. This usually involves connecting the positive terminal of one panel to the negative terminal of the next panel. Use appropriate connectors and ensure all connections are secure.
4. Connecting the Inverter: Connect the solar panels to the inverter. The inverter should be installed in a cool, shaded location, preferably close to your main electrical panel. Follow the manufacturer's instructions for wiring the inverter.
5. Connecting to the Grid: If you plan to connect your solar system to the grid, you'll need to work with your utility company. This usually involves installing a bi-directional meter that can measure both the electricity you consume and the electricity you generate. Your utility company may also require an inspection before you can connect to the grid.
Testing and Commissioning
Once the installation is complete, it's time to test and commission your solar system. This involves several steps:
1. System Check: Inspect all connections and ensure everything is securely fastened. Check for any loose wires or connections.
2. Power On: Turn on the inverter and monitor the system's performance. Most inverters have a display that shows the amount of electricity being generated.
3. Monitoring: Set up a monitoring system to track your solar system's performance. Many inverters come with built-in monitoring capabilities, or you can use third-party monitoring systems.
Maintenance and Troubleshooting
Maintaining your solar system is crucial for ensuring its long-term performance. Here are some maintenance tips:
1. Regular Inspections: Inspect your solar panels and mounting system regularly for any signs of damage or wear. Check for loose connections and clean the panels if they become dirty.
2. Inverter Maintenance: Keep the inverter clean and free from dust. Check the inverter's display regularly to ensure it's functioning correctly.
3. Professional Inspections: Schedule professional inspections every few years to ensure your system is in optimal condition.
Financial Considerations
Installing solar panels is a significant investment, but it can pay off in the long run. Here are some financial considerations:
1. Upfront Costs: The initial cost of purchasing and installing solar panels can be high. However, there are various financing options available, including solar loans, leases, and power purchase agreements (PPAs).
2. Incentives and Rebates: Many governments offer incentives and rebates for installing solar panels. These can significantly reduce the upfront cost. Check with your local government and utility company for available programs.
3. Energy Savings: Once your solar system is up and running, you'll start saving on your electricity bills. The amount you save depends on your energy consumption and the size of your solar system.
4. Return on Investment (ROI): Calculate the ROI of your solar system by comparing the upfront costs to the long-term savings. Most solar systems pay for themselves within 5 to 10 years.
Installing your own solar panels can be a rewarding project that provides long-term benefits. By following this guide, you can ensure a successful installation and enjoy the advantages of renewable energy. Remember to assess your home's solar potential, design your system carefully, purchase quality equipment, and follow the installation steps meticulously. With proper maintenance, your solar system will provide clean, renewable energy for many years to come.


