How To Make Your Phone A Projector?
In today's digital age, our smartphones have become indispensable tools for communication, entertainment, and productivity. One of the lesser-known yet highly intriguing capabilities of modern smartphones is their potential to function as projectors. Whether you want to share a presentation, watch a movie on a larger screen, or display photos during a family gathering, transforming your phone into a projector can be incredibly useful. This article will guide you through the various methods and practical steps to achieve this, ensuring you can make the most out of your smartphone's capabilities.
Understanding the Basics
Before diving into the methods, it's essential to understand the basic principles behind projecting images and videos from your phone. A projector works by casting light through a lens to display an image on a surface, such as a wall or screen. To turn your phone into a projector, you need to either use an external device that can project the phone's screen or create a DIY setup that mimics the functionality of a traditional projector.
Method 1: Using a Smartphone Projector
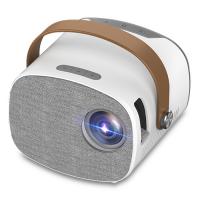
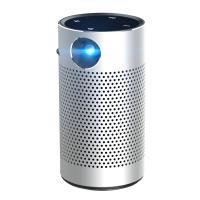
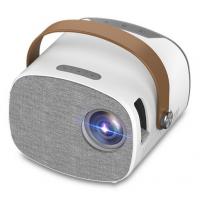
The most straightforward way to turn your phone into a projector is by using a smartphone projector. These are compact, portable devices specifically designed to project the screen of your smartphone. Here’s how you can use one:
1. Purchase a Smartphone Projector: There are various models available in the market, ranging from budget-friendly options to high-end devices. Some popular brands include Anker, AAXA, and Kodak.
2. Connect Your Phone: Most smartphone projectors come with multiple connectivity options, such as HDMI, USB, or wireless connections like Bluetooth or Wi-Fi. Depending on the model, you may need an adapter to connect your phone.
3. Adjust the Settings: Once connected, you may need to adjust the projector's settings to ensure the best image quality. This includes focusing the lens, adjusting the brightness, and setting the correct aspect ratio.
4. Project Your Content: After setting up, you can start projecting your content. Whether it’s a movie, a presentation, or photos, you can control what’s displayed using your phone.
Method 2: DIY Smartphone Projector
If you’re on a budget or enjoy DIY projects, you can create your own smartphone projector using simple household items. Here’s a step-by-step guide:
1. Gather Materials: You’ll need a magnifying glass, a cardboard box, a smartphone, tape, and a pair of scissors or a utility knife.
2. Prepare the Box: Cut a hole in one side of the cardboard box that matches the size of the magnifying glass. This will serve as the lens of your projector.
3. Install the Magnifying Glass: Secure the magnifying glass in the hole using tape. Ensure it’s firmly in place and that there are no gaps around the edges.
4. Create a Phone Stand: Inside the box, create a stand for your phone using additional pieces of cardboard. This stand should hold your phone in place and at the correct distance from the magnifying glass.
5. Adjust the Focus: Place your phone on the stand and play a video or display an image. Close the box and project the image onto a wall. You may need to move the phone closer or further from the magnifying glass to get a clear image.
6. Enhance the Projection: For better image quality, ensure the room is dark and the projection surface is smooth and white. You can also adjust the brightness and orientation of your phone’s screen.
Method 3: Using a Streaming Device
Another effective way to project your phone’s screen is by using a streaming device like Chromecast, Apple TV, or Roku. These devices allow you to wirelessly mirror your phone’s screen onto a TV or projector. Here’s how:
1. Set Up the Streaming Device: Connect the streaming device to your TV or projector using an HDMI cable. Follow the manufacturer’s instructions to set up the device.
2. Connect Your Phone: Ensure your phone and the streaming device are connected to the same Wi-Fi network. Use the corresponding app (Google Home for Chromecast, AirPlay for Apple TV, etc.) to connect your phone to the device.
3. Mirror Your Screen: Once connected, you can mirror your phone’s screen. This allows you to project any content from your phone onto the larger screen.
Tips for Optimal Projection
Regardless of the method you choose, here are some tips to ensure the best projection experience:
1. Darken the Room: A darker room will enhance the visibility and clarity of the projected image.
2. Use a Smooth, White Surface: Projecting onto a smooth, white surface will provide the best image quality. If you don’t have a projector screen, a white wall or a large white sheet can work well.
3. Adjust the Brightness: Depending on the ambient light and the quality of your projector, you may need to adjust the brightness settings on your phone or the projector.
4. Focus the Image: Ensure the projected image is in focus. This may require adjusting the distance between the projector and the projection surface or using the focus adjustment on the projector.
5. Sound Considerations: If you’re watching a movie or giving a presentation, consider using external speakers for better sound quality. Many projectors have built-in speakers, but they may not provide the best audio experience.
Turning your phone into a projector can be a fun and practical way to share content with a larger audience. Whether you opt for a ready-made smartphone projector, a DIY setup, or a streaming device, each method has its own advantages and can be tailored to your specific needs and budget. By following the steps outlined in this article and considering the tips for optimal projection, you can make the most out of your smartphone’s capabilities and enjoy a larger-than-life viewing experience.

