How To Mount A Projector?
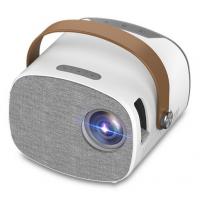
Mounting a projector can transform your home entertainment system, office, or classroom into a dynamic visual experience. However, the process can seem daunting if you’ve never done it before. This comprehensive guide will walk you through the steps to mount a projector, ensuring you achieve the best possible setup for your needs.
Understanding Your Projector and Space
Before you begin, it’s crucial to understand the type of projector you have and the space where you plan to mount it. Projectors come in various types, including DLP, LCD, and LED, each with its own mounting requirements. Additionally, the size and layout of your room will influence the placement and type of mount you need.
Tools and Materials Needed
To mount a projector, you’ll need the following tools and materials:
- Projector mount (ceiling or wall)
- Measuring tape
- Stud finder
- Drill and appropriate drill bits
- Screwdriver
- Level
- Screws and anchors
- HDMI cables or other necessary connection cables
- Power drill
- Ladder or step stool
Step-by-Step Guide to Mounting a Projector
1. Choose the Right Location
The first step is to choose the optimal location for your projector. Consider the following factors:
- Screen Size and Throw Distance: Check the projector’s manual for the recommended throw distance, which is the distance between the projector and the screen. This will help you determine where to place the projector.
- Viewing Angle: Ensure the projector is positioned so that the image is at eye level when seated. This will provide the best viewing experience.
- Room Lighting: Minimize ambient light to enhance image quality. Darker rooms are ideal for projectors.
2. Find the Ceiling or Wall Studs
Using a stud finder, locate the studs in the ceiling or wall where you plan to mount the projector. Mark the stud locations with a pencil. Mounting the projector to a stud ensures it is securely attached and can support the weight.
3. Assemble the Projector Mount
Follow the instructions provided with your projector mount to assemble it. Most mounts come with a universal bracket that attaches to the projector and an arm that connects to the ceiling or wall. Ensure all screws and bolts are tightened securely.
4. Attach the Mount to the Projector
Attach the mounting bracket to the projector using the screws provided. Make sure the bracket is aligned correctly and securely fastened. This step is crucial to ensure the projector is stable and won’t shift or fall.
5. Drill Holes for the Mount
Hold the projector mount up to the ceiling or wall, aligning it with the stud marks you made earlier. Use a pencil to mark the locations where you need to drill holes for the screws. Drill pilot holes at these marks to make it easier to insert the screws.
6. Secure the Mount to the Ceiling or Wall
Using the screws and anchors provided, secure the mount to the ceiling or wall. If you’re mounting to a ceiling, ensure the mount is level before tightening the screws completely. Use a level to check the alignment.
7. Attach the Projector to the Mount
With the mount securely attached to the ceiling or wall, it’s time to attach the projector. This step may require an extra set of hands to hold the projector while you secure it to the mount. Follow the instructions provided with your mount to ensure the projector is securely attached.
8. Adjust the Projector
Once the projector is mounted, you’ll need to adjust it to achieve the best image quality. This includes:
- Focus: Adjust the focus ring on the projector to ensure the image is sharp.
- Keystone Correction: Use the keystone correction feature to adjust the image shape if it appears distorted.
- Zoom: Adjust the zoom to fit the image to your screen size.
9. Connect the Cables
Connect the necessary cables to your projector, including HDMI, power, and any other required connections. Ensure the cables are long enough to reach your devices and are neatly organized to avoid any tripping hazards.
10. Test the Setup
Turn on the projector and test the setup to ensure everything is working correctly. Check the image quality, alignment, and focus. Make any necessary adjustments to achieve the best possible picture.
Tips for a Successful Projector Mounting
- Cable Management: Use cable management solutions like cable clips or raceways to keep cables organized and out of sight.
- Regular Maintenance: Clean the projector lens regularly to maintain image quality. Dust and debris can accumulate over time and affect the picture.
- Ventilation: Ensure the projector has adequate ventilation to prevent overheating. Avoid placing it in enclosed spaces without proper airflow.
Troubleshooting Common Issues
Even with careful planning, you may encounter some issues when mounting your projector. Here are some common problems and solutions:
- Image is Blurry: Check the focus and ensure the projector is the correct distance from the screen. Clean the lens if necessary.
- Image is Crooked or Distorted: Use the keystone correction feature to adjust the image shape. Ensure the projector is level and aligned with the screen.
- Projector Overheating: Ensure the projector has adequate ventilation and is not placed in an enclosed space. Clean the air filters regularly.
Mounting a projector can seem like a complex task, but with the right tools and a step-by-step approach, it’s entirely manageable. By carefully selecting the location, securely attaching the mount, and making the necessary adjustments, you can create an impressive visual setup for your home, office, or classroom. Remember to follow the manufacturer’s instructions and take your time to ensure a safe and successful installation. With your projector properly mounted, you can enjoy a high-quality viewing experience for years to come.

