How To Mount Solar Panels On Rv?
Mounting solar panels on an RV is a practical and increasingly popular way to ensure a reliable source of power while on the road. This process, while straightforward, requires careful planning and execution to maximize efficiency and safety. In this article, we will delve into the step-by-step process of mounting solar panels on an RV, covering everything from selecting the right panels to the final installation and maintenance.
Understanding Your Power Needs
Before you begin the installation process, it’s crucial to understand your power needs. Calculate the total wattage required by all the devices and appliances you plan to use in your RV. This will help you determine the number and size of solar panels you need. For instance, if your daily power consumption is around 1,000 watt-hours, you might need a system that can generate at least that much energy, considering factors like sunlight availability and panel efficiency.
Selecting the Right Solar Panels
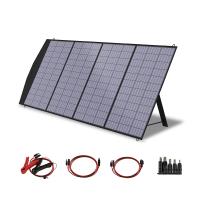
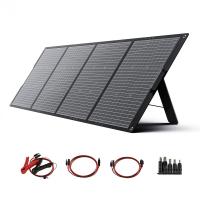
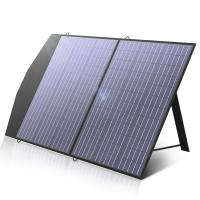
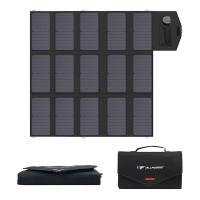
There are various types of solar panels available, but the most common ones for RVs are monocrystalline and polycrystalline panels. Monocrystalline panels are more efficient and take up less space, making them ideal for RVs where roof space is limited. Polycrystalline panels are generally less expensive but also less efficient. Consider the space available on your RV’s roof and your budget when making a choice.
Gathering Necessary Tools and Materials
To mount solar panels on your RV, you will need the following tools and materials:
- Solar panels
- Mounting brackets
- Drill and drill bits
- Screws and bolts
- Sealant (preferably a weatherproof one)
- Wiring (solar cables)
- Charge controller
- Inverter (if you plan to use AC appliances)
- Battery bank (for storing the generated power)
- Multimeter (for testing electrical connections)
Planning the Layout
The next step is to plan the layout of your solar panels on the RV roof. Ensure that the panels are positioned in a way that maximizes exposure to sunlight. Avoid placing them near objects that could cast shadows, such as air conditioning units or vents. It’s also important to leave some space between the panels and the roof to allow for airflow, which helps in cooling the panels and maintaining their efficiency.
Installing the Mounting Brackets
Once you have planned the layout, it’s time to install the mounting brackets. These brackets will hold the solar panels in place. Follow these steps:
1. Mark the Positions: Use a marker to outline where the brackets will be placed on the roof.
2. Drill Holes: Carefully drill holes at the marked positions. Ensure that the holes are slightly smaller than the screws to ensure a tight fit.
3. Apply Sealant: Apply a generous amount of sealant around the holes to prevent water from seeping in.
4. Attach Brackets: Secure the brackets to the roof using screws and bolts. Make sure they are tightly fastened to withstand wind and movement.
Mounting the Solar Panels
With the brackets in place, you can now mount the solar panels. Here’s how:
1. Position the Panels: Place the solar panels on the brackets, ensuring they are aligned correctly.
2. Secure the Panels: Use the provided hardware to secure the panels to the brackets. Double-check that all screws and bolts are tightened properly.
3. Check Stability: Gently shake the panels to ensure they are firmly attached and won’t move during travel.
Wiring the System
Proper wiring is crucial for the efficient functioning of your solar power system. Follow these steps:
1. Connect Panels in Series or Parallel: Depending on your power needs and the type of panels, connect them either in series (for higher voltage) or parallel (for higher current).
2. Run the Wires: Route the wires from the panels to the charge controller. Use cable ties to secure the wires and prevent them from flapping around.
3. Install the Charge Controller: Mount the charge controller inside the RV, close to the battery bank. Connect the wires from the panels to the charge controller’s input terminals.
4. Connect to Battery Bank: Connect the charge controller’s output terminals to the battery bank. Ensure the connections are tight and secure.
5. Install the Inverter: If you plan to use AC appliances, install the inverter and connect it to the battery bank.
Testing the System
Before you hit the road, it’s essential to test the entire system to ensure everything is working correctly. Use a multimeter to check the voltage and current at various points in the system. Verify that the charge controller is regulating the power correctly and that the batteries are charging. Test the inverter by plugging in an AC appliance to ensure it’s functioning properly.
Maintenance Tips
To keep your solar power system running efficiently, regular maintenance is necessary. Here are some tips:
- Clean the Panels: Dust and debris can reduce the efficiency of your solar panels. Clean them regularly with a soft cloth and mild detergent.
- Check Connections: Periodically inspect all electrical connections to ensure they are tight and free from corrosion.
- Monitor Performance: Keep an eye on the performance of your system. If you notice a drop in efficiency, troubleshoot the system to identify and fix any issues.
Mounting solar panels on your RV is a rewarding project that can provide you with a reliable source of power while on the road. By carefully planning the installation, selecting the right components, and following the steps outlined in this article, you can set up an efficient and durable solar power system. Regular maintenance will ensure that your system continues to perform optimally, allowing you to enjoy the freedom and convenience of solar power during your travels.

