How To Place Camera On Tripod?
Placing a camera on a tripod is a fundamental skill for photographers and videographers, whether they are amateurs or professionals. A tripod provides stability, reduces camera shake, and allows for precise framing and composition. In this article, we will delve into the step-by-step process of mounting a camera on a tripod, discuss the different types of tripod heads, and offer tips for ensuring your camera is securely attached. By the end of this guide, you will have a comprehensive understanding of how to effectively use a tripod to enhance your photography and videography.
Step-by-Step Guide to Mounting a Camera on a Tripod
1. Choose the Right Tripod and Head
- Tripod Types: There are various types of tripods, including travel tripods, studio tripods, and tabletop tripods. Choose one that suits your needs based on portability, height, and stability.
- Tripod Heads: The head is the part of the tripod that holds the camera. Common types include ball heads, pan-tilt heads, and gimbal heads. Each type offers different levels of control and flexibility.
2. Extend the Tripod Legs
- Unlock the Leg Locks: Most tripods have leg locks that need to be unlocked to extend the legs. These can be twist locks or flip locks.
- Extend to Desired Height: Extend the legs to the desired height, ensuring that the tripod is stable. For maximum stability, extend the thicker sections of the legs first.
- Adjust the Leg Angles: Some tripods allow you to adjust the angle of the legs for added stability on uneven surfaces.
3. Level the Tripod
- Use the Bubble Level: Many tripods come with a built-in bubble level. Adjust the legs until the bubble is centered, indicating that the tripod is level.
- Fine-Tune the Position: Make any necessary fine adjustments to ensure the tripod is perfectly level, which is crucial for certain types of photography, such as panoramas.
4. Attach the Quick Release Plate to the Camera
- Locate the Tripod Mounting Hole: On the bottom of your camera, there is a threaded hole designed for tripod mounting.
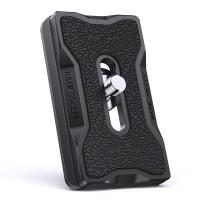
- Attach the Quick Release Plate: Most tripods come with a quick release plate that screws into this hole. Use a coin or a screwdriver to tighten the plate securely.
- Ensure Proper Alignment: Make sure the plate is aligned correctly with the camera body to avoid any tilting or imbalance.
5. Mount the Camera on the Tripod
- Engage the Quick Release Mechanism: Slide or snap the quick release plate (with the camera attached) into the tripod head. Ensure it clicks into place.
- Secure the Camera: Tighten any additional locking mechanisms to ensure the camera is securely attached to the tripod head.
6. Adjust the Tripod Head
- Pan and Tilt: Use the controls on the tripod head to pan (move left and right) and tilt (move up and down) the camera. This allows you to frame your shot precisely.
- Lock the Position: Once you have the desired composition, lock the tripod head in place to prevent any movement.
Types of Tripod Heads and Their Uses
1. Ball Head
- Flexibility: Ball heads offer a high degree of flexibility, allowing for quick adjustments in any direction.
- Ease of Use: They are easy to use and are ideal for photographers who need to make rapid changes to their composition.
- Stability: High-quality ball heads provide excellent stability and are suitable for most types of photography.
2. Pan-Tilt Head
- Precision: Pan-tilt heads allow for precise control over the camera's movement, making them ideal for architectural and landscape photography.
- Separate Controls: They have separate controls for panning and tilting, which can be locked independently.
- Bulkier: These heads are generally bulkier and heavier than ball heads, which can be a consideration for travel photographers.
3. Gimbal Head
- For Telephoto Lenses: Gimbal heads are designed to support heavy telephoto lenses, making them ideal for wildlife and sports photography.
- Smooth Movement: They allow for smooth panning and tilting, even with heavy equipment.
- Specialized Use: Gimbal heads are more specialized and may not be necessary for general photography.
Tips for Ensuring Your Camera is Securely Attached
1. Check the Quick Release Plate
- Tighten Regularly: Ensure the quick release plate is tightly secured to the camera. Check it regularly, especially if you are moving the tripod frequently.
- Use Safety Mechanisms: Some quick release plates come with additional safety mechanisms to prevent accidental release. Make use of these features.
2. Inspect the Tripod Head
- Locking Mechanisms: Ensure all locking mechanisms on the tripod head are engaged and secure.
- Test Stability: Gently test the stability of the camera on the tripod by giving it a slight push. It should remain stable and not wobble.
3. Use a Strap for Extra Security
- Camera Strap: If you are concerned about the camera falling, use the camera strap as an additional safety measure. Loop it around the tripod for extra security.
4. Be Mindful of the Environment
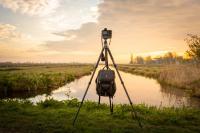
- Wind and Vibration: In windy conditions or environments with vibrations (e.g., near a road), be extra cautious. Use a weight hook (if your tripod has one) to add stability by hanging a weight or your camera bag.
Mounting a camera on a tripod is a straightforward process, but it requires attention to detail to ensure stability and security. By following the steps outlined in this guide, you can confidently set up your camera on a tripod, allowing you to focus on capturing the perfect shot. Whether you are using a ball head for flexibility, a pan-tilt head for precision, or a gimbal head for heavy lenses, understanding how to properly use your tripod will significantly enhance your photography and videography skills. Remember to regularly check the security of your setup and be mindful of environmental factors that could affect stability. With practice, using a tripod will become second nature, and you will be able to take full advantage of the benefits it offers.









There are no comments for this blog.