How To Record Audio With Screen Capture?
Recording audio with screen capture is a common requirement for creating tutorials, presentations, gaming videos, and more. Whether you're a content creator, educator, or professional, knowing how to effectively capture both your screen and audio can significantly enhance the quality of your output. In this article, we will explore various methods and tools to help you achieve this, ensuring you can produce high-quality recordings with ease.
Understanding the Basics
Before diving into the tools and techniques, it's essential to understand the basics of screen capture and audio recording. Screen capture involves recording the visual output of your computer screen, while audio recording captures sound from your system or an external microphone. Combining these two elements allows you to create comprehensive and engaging content.
Choosing the Right Tool
Several tools are available for screen capture and audio recording, each with its own set of features and capabilities. Here are some popular options:
1. OBS Studio (Open Broadcaster Software)
- Pros: Free, open-source, highly customizable, supports multiple audio and video sources.
- Cons: Steeper learning curve for beginners.
- Best For: Advanced users who need extensive customization and control over their recordings.
2. Camtasia
- Pros: User-friendly interface, built-in editing tools, high-quality output.
- Cons: Expensive, limited advanced features compared to OBS.
- Best For: Users who need an all-in-one solution with easy editing capabilities.
3. ScreenFlow (Mac)
- Pros: High-quality recording, intuitive interface, powerful editing tools.
- Cons: Mac-only, expensive.
- Best For: Mac users looking for a professional-grade tool.
4. ShareX
- Pros: Free, open-source, lightweight, supports various capture methods.
- Cons: Limited editing features, not as user-friendly as some paid options.
- Best For: Users who need a free, lightweight solution with basic editing capabilities.
5. QuickTime Player (Mac)
- Pros: Free, built-in on Mac, simple to use.
- Cons: Limited features, basic editing tools.
- Best For: Mac users who need a quick and easy solution for basic recordings.
Setting Up Your Recording Environment

Regardless of the tool you choose, setting up your recording environment is crucial for achieving high-quality results. Here are some tips to consider:
1. Choose a Quiet Location: Ensure your recording environment is free from background noise to capture clear audio.
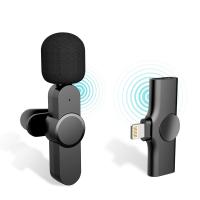
2. Use a Good Microphone: Invest in a quality microphone to improve audio clarity and reduce background noise.
3. Adjust Screen Resolution: Set your screen resolution to match the desired output quality of your recording.
4. Close Unnecessary Applications: Close any applications that are not needed during the recording to prevent distractions and improve performance.
5. Test Your Setup: Perform a test recording to check audio levels, screen resolution, and overall quality before starting your actual recording.
Recording with OBS Studio

OBS Studio is a powerful and versatile tool for screen capture and audio recording. Here’s a step-by-step guide to get you started:
1. Download and Install OBS Studio: Visit the OBS Studio website, download the appropriate version for your operating system, and install it.
2. Configure Settings: Open OBS Studio and navigate to the settings menu. Adjust the video and audio settings to match your desired output quality.
3. Add Sources: In the main OBS interface, click the "+" button under the "Sources" section to add your screen capture and audio sources. You can add multiple sources, such as a display capture for your screen and an audio input capture for your microphone.
4. Arrange Sources: Arrange your sources in the desired order. You can resize and position them as needed.
5. Start Recording: Click the "Start Recording" button to begin capturing your screen and audio. When you're finished, click "Stop Recording" to save your file.
Recording with Camtasia
Camtasia is a user-friendly tool that combines screen capture and editing capabilities. Here’s how to use it:
1. Download and Install Camtasia: Visit the Camtasia website, download the software, and follow the installation instructions.
2. Launch Camtasia: Open the application and select "New Recording" from the main interface.
3. Select Recording Area: Choose the area of your screen you want to capture. You can select the entire screen or a specific region.
4. Configure Audio Settings: Ensure your microphone and system audio are selected in the audio settings.
5. Start Recording: Click the "Record" button to begin capturing your screen and audio. When you're done, click the "Stop" button.
6. Edit and Export: Use Camtasia’s built-in editing tools to enhance your recording. Once satisfied, export your video in the desired format.
Recording with QuickTime Player (Mac)
QuickTime Player is a simple and free option for Mac users. Here’s how to use it:
1. Open QuickTime Player: Launch QuickTime Player from your Applications folder.
2. Select New Screen Recording: From the File menu, select "New Screen Recording."
3. Configure Audio Settings: Click the drop-down arrow next to the record button and select your microphone.
4. Start Recording: Click the record button and choose the area of your screen you want to capture. Click "Start Recording" to begin.
5. Stop Recording: Click the stop button in the menu bar when you're finished. Save your recording to the desired location.
Tips for High-Quality Recordings
To ensure your recordings are of the highest quality, consider the following tips:
1. Use a Pop Filter: If you're using an external microphone, a pop filter can help reduce plosive sounds and improve audio clarity.
2. Monitor Audio Levels: Keep an eye on your audio levels to avoid distortion or clipping. Adjust the input volume as needed.
3. Edit Your Recordings: Use editing software to trim unwanted sections, add annotations, and enhance the overall quality of your recordings.
4. Practice: The more you practice, the more comfortable you'll become with the recording process. Experiment with different settings and techniques to find what works best for you.
Recording audio with screen capture is an essential skill for creating engaging and informative content. By choosing the right tool, setting up your recording environment, and following best practices, you can produce high-quality recordings that meet your needs. Whether you're using OBS Studio, Camtasia, QuickTime Player, or another tool, the key is to experiment and find the workflow that works best for you. With practice and attention to detail, you'll be able to create professional-grade recordings that captivate your audience.

