How To Set Up A Webcam?
Setting up a webcam can seem like a daunting task, especially if you're not particularly tech-savvy. However, with the right guidance, it can be a straightforward process. Whether you're setting up a webcam for video conferencing, streaming, or simply to stay in touch with family and friends, this article will walk you through the steps to get your webcam up and running smoothly.
Understanding Your Webcam
Before diving into the setup process, it's important to understand the type of webcam you have. Webcams generally fall into two categories: built-in and external. Built-in webcams are integrated into laptops and some desktop monitors, while external webcams are standalone devices that connect to your computer via USB or other ports.
Step-by-Step Guide to Setting Up Your Webcam
1. Unboxing and Inspecting Your Webcam
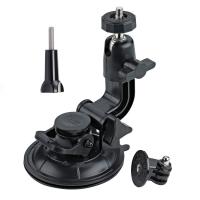
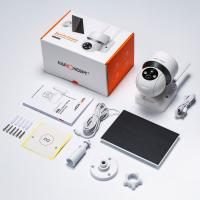
If you have an external webcam, start by unboxing it and inspecting the contents. Most webcams come with a USB cable, a user manual, and sometimes additional accessories like a tripod or mounting clip. Ensure that all components are present and in good condition.
2. Connecting the Webcam
For external webcams:
- USB Connection: Plug the USB cable from the webcam into an available USB port on your computer. Most modern webcams use USB 2.0 or 3.0 connections.
- Positioning: Place the webcam on top of your monitor or laptop screen. Many webcams come with adjustable clips or stands to help secure them in place. Ensure the camera is at eye level for the best angle.
For built-in webcams:
- Activation: Built-in webcams are usually ready to use out of the box. You may need to enable the webcam through your computer's settings or a specific function key on your keyboard.
3. Installing Drivers and Software
Most modern operating systems, like Windows and macOS, will automatically recognize the webcam and install the necessary drivers. However, some webcams may require you to install specific drivers or software to unlock their full functionality.
- Automatic Installation: Once you connect the webcam, your computer should automatically detect it and install the necessary drivers. You may see a notification indicating that the device is ready to use.
- Manual Installation: If the webcam came with a CD or a download link, follow the instructions to install the drivers and any additional software. This software often includes features like zoom, pan, tilt, and special effects.
4. Configuring Webcam Settings
After installing the drivers and software, it's time to configure the webcam settings to ensure optimal performance.
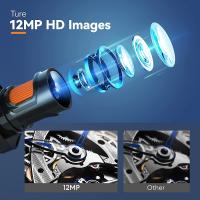
- Resolution and Frame Rate: Adjust the resolution and frame rate settings based on your needs. Higher resolution and frame rate provide better video quality but may require more bandwidth and processing power.
- Focus and Exposure: Some webcams offer manual focus and exposure settings. Adjust these settings to ensure a clear and well-lit image.
- Microphone Settings: If your webcam has a built-in microphone, configure the audio settings to ensure clear sound. You may need to adjust the input volume and noise reduction settings.
5. Testing Your Webcam
Before using your webcam for important calls or recordings, it's crucial to test it to ensure everything is working correctly.
- Built-in Camera App: Most operating systems come with a built-in camera app that allows you to test your webcam. Open the app and check the video and audio quality.
- Video Conferencing Software: Test your webcam with the video conferencing software you plan to use, such as Zoom, Skype, or Microsoft Teams. Most of these applications have a settings menu where you can test and configure your webcam.
Troubleshooting Common Issues
Despite following the setup steps, you may encounter some common issues. Here are a few troubleshooting tips:
- No Video: If your webcam isn't displaying video, ensure it's properly connected and that the drivers are installed. Check the privacy settings on your computer to ensure the webcam is enabled.
- Poor Video Quality: Adjust the resolution, focus, and exposure settings. Ensure there's adequate lighting in the room.
- No Audio: If the built-in microphone isn't working, check the audio settings and ensure the correct input device is selected. You may also need to update the audio drivers.
Enhancing Your Webcam Experience
Once your webcam is set up and working correctly, you can take a few additional steps to enhance your experience:
- Lighting: Good lighting can significantly improve video quality. Consider using a ring light or positioning yourself near a natural light source.
- Background: A clean and uncluttered background can make your video calls look more professional. Some video conferencing software also offers virtual backgrounds.
- External Microphone: If the built-in microphone quality isn't satisfactory, consider using an external microphone for better audio clarity.
Setting up a webcam doesn't have to be a complicated process. By following the steps outlined in this guide, you can ensure your webcam is properly installed, configured, and ready to use. Whether you're using it for work, streaming, or staying connected with loved ones, a well-setup webcam can make a significant difference in your online interactions.
Remember, the key to a successful webcam setup is understanding your device, installing the necessary drivers and software, configuring the settings, and testing the equipment. With these steps, you'll be well on your way to a seamless webcam experience.


