How To Test My Webcam?
Testing your webcam is an essential task, whether you're preparing for a virtual meeting, an online class, or simply ensuring your hardware is functioning correctly. In this article, we will explore various methods to test your webcam, covering both built-in and external webcams. We will also address common issues and provide troubleshooting tips to ensure your webcam is working optimally.
Why Testing Your Webcam is Important
Before diving into the methods, it's crucial to understand why testing your webcam is important. A malfunctioning webcam can lead to poor video quality, which can be frustrating during important calls or recordings. Testing your webcam helps you:
1. Ensure Compatibility: Verify that your webcam is compatible with your operating system and applications.
2. Check Video Quality: Assess the video quality to ensure it meets your needs.
3. Identify Issues: Detect any hardware or software issues that may need troubleshooting.
4. Optimize Settings: Adjust settings for the best performance.
Methods to Test Your Webcam
1. Using Built-in Camera Apps
Most operating systems come with built-in camera applications that allow you to test your webcam easily.
Windows:
- Camera App: Open the Camera app by typing "Camera" in the search bar and selecting the app. If your webcam is working, you should see a live feed. You can also take photos and record videos to test the quality.
MacOS:
- Photo Booth: Open Photo Booth from the Applications folder. If your webcam is functioning, you will see a live feed. You can take snapshots and record videos to evaluate the performance.
2. Online Webcam Test Tools
Several online tools can help you test your webcam without installing any software. These tools are convenient and easy to use.
- Webcam Test: Visit websites like webcamtests.com or webcammictest.com. These sites usually have a "Test Webcam" button that, when clicked, will display your webcam feed. You can also check the resolution, frame rate, and other parameters.
3. Video Conferencing Applications
Video conferencing applications like Zoom, Skype, and Google Meet have built-in tools to test your webcam.
Zoom:
- Open Zoom and go to Settings > Video. You will see a preview of your webcam feed. You can also join a test meeting at zoom.us/test to check your video and audio settings.
Skype:
- Open Skype and go to Settings > Audio & Video. You will see a live preview of your webcam feed. You can also make a test call to ensure everything is working correctly.
Google Meet:
- Start a new meeting or join an existing one. Click on the three dots in the bottom right corner and select Settings > Video. You will see a preview of your webcam feed.
4. Third-Party Software
There are several third-party applications available that offer more advanced testing and diagnostic features.
- ManyCam: ManyCam is a popular webcam software that allows you to test your webcam, apply filters, and adjust settings. It also provides diagnostic tools to identify and fix issues.
- OBS Studio: OBS Studio is a powerful open-source software for video recording and live streaming. It allows you to test your webcam and adjust various settings for optimal performance.
Common Issues and Troubleshooting
Even after testing, you may encounter issues with your webcam. Here are some common problems and their solutions:
1. Webcam Not Detected
Solution:
- Check Connections: Ensure that your external webcam is properly connected to your computer. Try using a different USB port.
- Update Drivers: Outdated or missing drivers can cause detection issues. Update your webcam drivers through Device Manager (Windows) or System Preferences (MacOS).
- Enable Webcam: Some laptops have a physical switch or function key to enable/disable the webcam. Make sure it is turned on.
2. Poor Video Quality
Solution:
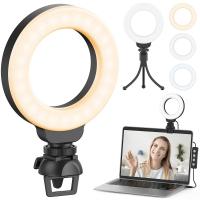
- Lighting: Ensure you have adequate lighting. Natural light is best, but you can also use lamps or ring lights.
- Clean Lens: Dust and smudges on the lens can affect video quality. Clean the lens with a soft, lint-free cloth.
- Adjust Settings: Use the settings in your camera app or third-party software to adjust brightness, contrast, and resolution.
3. Audio Issues
Solution:
- Check Microphone: Ensure your webcam's built-in microphone is selected as the input device in your audio settings.
- Update Drivers: Just like with video, outdated audio drivers can cause issues. Update them through Device Manager (Windows) or System Preferences (MacOS).
- External Microphone: If the built-in microphone is not working well, consider using an external microphone for better audio quality.
Optimizing Webcam Performance
Once you've tested your webcam and addressed any issues, you can take additional steps to optimize its performance.
1. Positioning
- Eye Level: Position your webcam at eye level to create a more natural and engaging appearance.
- Background: Choose a clean, uncluttered background to minimize distractions.
2. Software Settings
- Resolution: Higher resolution provides better video quality but requires more bandwidth. Adjust the resolution based on your internet speed.
- Frame Rate: A higher frame rate (30 fps or more) results in smoother video. Adjust this setting in your camera app or third-party software.
3. Hardware Upgrades
- External Webcam: If your built-in webcam is not meeting your needs, consider investing in a high-quality external webcam.
- Lighting: Good lighting can significantly improve video quality. Consider using a ring light or softbox.
Testing your webcam is a straightforward process that can save you from potential issues during important video calls or recordings. By using built-in camera apps, online tools, video conferencing applications, or third-party software, you can easily test and optimize your webcam. Addressing common issues and following best practices for positioning and settings will ensure you get the best performance from your webcam.
Whether you're a professional preparing for a virtual meeting, a student attending online classes, or someone who enjoys video chatting with friends and family, ensuring your webcam is functioning correctly is essential. By following the steps outlined in this article, you can confidently use your webcam for any purpose, knowing that it will deliver the quality and reliability you need.








There are no comments for this blog.