How To Use Iphone Camera As Webcam?
In today's digital age, the need for high-quality video communication has never been more critical. Whether you're attending virtual meetings, streaming content, or connecting with loved ones, having a reliable and high-quality webcam is essential. However, not everyone has access to a dedicated webcam, and even those who do might find that their built-in laptop cameras don't offer the best quality. Fortunately, if you own an iPhone, you have a powerful camera right in your pocket that can be used as a webcam. This article will guide you through the process of using your iPhone camera as a webcam, ensuring you get the best video quality for your needs.
Why Use an iPhone Camera as a Webcam?
Before diving into the how-to, it's essential to understand why you might want to use your iPhone camera as a webcam. Here are a few compelling reasons:
1. Superior Camera Quality: iPhones, especially the newer models, come equipped with high-resolution cameras that often surpass the quality of standard webcams.
2. Portability: Your iPhone is portable and can be easily positioned to get the best angle for your video calls.
3. Cost-Effective: Instead of purchasing a new webcam, you can utilize a device you already own.
4. Versatility: Using your iPhone as a webcam allows you to switch between front and rear cameras, giving you more flexibility in your video setup.
What You Need
To use your iPhone camera as a webcam, you'll need a few things:
1. iPhone: Any model with a decent camera will work, but newer models will provide better quality.
2. App: You'll need a third-party app to bridge the connection between your iPhone and your computer.
3. Computer: A PC or Mac where you'll be using the webcam.
4. USB Cable or Wi-Fi: Depending on the app you choose, you may need a USB cable or a stable Wi-Fi connection.
Step-by-Step Guide
1. Choose the Right App
Several apps can turn your iPhone into a webcam. Some popular options include:
- EpocCam: Available for both Windows and Mac, EpocCam offers a free version with basic features and a paid version with additional functionalities.
- iVCam: Another versatile option that supports both USB and Wi-Fi connections.
- Reincubate Camo: Known for its high-quality video output and extensive customization options, though it comes with a subscription fee.
For this guide, we'll use EpocCam as an example, but the steps are similar for other apps.
2. Install the App on Your iPhone
Go to the App Store on your iPhone and search for EpocCam. Download and install the app.
3. Install the Drivers on Your Computer
Visit the EpocCam website and download the necessary drivers for your computer. Follow the installation instructions to set up the drivers.
4. Connect Your iPhone to Your Computer
You can connect your iPhone to your computer using a USB cable or over Wi-Fi. For a more stable connection, a USB cable is recommended.
- USB Connection: Simply plug your iPhone into your computer using a USB cable.
- Wi-Fi Connection: Ensure both your iPhone and computer are connected to the same Wi-Fi network.
5. Launch the App on Your iPhone
Open the EpocCam app on your iPhone. You should see a screen indicating that the app is ready to connect.
6. Configure Your Video Conferencing Software
Open your preferred video conferencing software (e.g., Zoom, Microsoft Teams, Skype) and go to the video settings. Select EpocCam as your video source. Your iPhone camera should now be functioning as a webcam.
Tips for Optimal Performance
To ensure you get the best performance and video quality, consider the following tips:
1. Lighting: Good lighting is crucial for high-quality video. Position yourself in a well-lit area or use additional lighting sources.
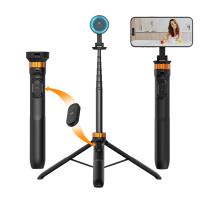
2. Stability: Use a tripod or a stable surface to keep your iPhone steady during video calls.
3. Battery Life: If you're using a USB connection, your iPhone will charge while in use. For Wi-Fi connections, ensure your iPhone is adequately charged or connected to a power source.
4. Camera Settings: Some apps, like Reincubate Camo, offer advanced camera settings. Experiment with these settings to get the best video quality.
Troubleshooting Common Issues
While using your iPhone as a webcam is generally straightforward, you might encounter some issues. Here are common problems and their solutions:
1. Connection Issues: If your iPhone isn't connecting to your computer, ensure the app and drivers are correctly installed. Restart both devices and try again.
2. Lag or Latency: For Wi-Fi connections, ensure a strong and stable network. Switching to a USB connection can also reduce lag.
3. App Crashes: Ensure you're using the latest version of the app and drivers. Reinstalling the app can also resolve crashes.
Alternatives to Using an iPhone as a Webcam
If you find that using your iPhone as a webcam isn't meeting your needs, there are other alternatives:
1. Dedicated Webcams: Investing in a high-quality webcam can provide better performance and features tailored for video conferencing.
2. DSLR or Mirrorless Cameras: For professional-quality video, consider using a DSLR or mirrorless camera with a capture card.
3. Built-in Laptop Cameras: While not the best quality, built-in cameras can be a temporary solution if other options aren't available.
Using your iPhone camera as a webcam is a practical and cost-effective solution for improving your video quality during virtual meetings and streams. With the right app and setup, you can leverage the superior camera capabilities of your iPhone to achieve professional-looking video. By following the steps outlined in this guide and considering the tips for optimal performance, you'll be well on your way to enhancing your video communication experience. Whether for work, streaming, or personal use, turning your iPhone into a webcam is a valuable skill in today's digital world.




There are no comments for this blog.