How To Use Your Iphone As A Webcam?
In today's digital age, the need for high-quality video communication has never been more critical. Whether you're attending virtual meetings, streaming content, or connecting with loved ones, having a reliable webcam is essential. However, not everyone has access to a high-quality webcam, and purchasing one can be an additional expense. Fortunately, if you own an iPhone, you already have a powerful camera in your pocket that can be used as a webcam. This article will guide you through the process of using your iPhone as a webcam, providing practical solutions to common challenges and ensuring you get the best possible video quality.
Why Use Your iPhone as a Webcam?
Before diving into the how-to, it's essential to understand why using your iPhone as a webcam is a viable option. iPhones are equipped with high-resolution cameras that often surpass the quality of standard webcams. Additionally, using your iPhone can save you money and reduce the need for extra equipment. The flexibility and portability of an iPhone also mean you can easily adjust angles and positions to get the perfect shot.
Requirements
To use your iPhone as a webcam, you'll need the following:
1. iPhone: Preferably an iPhone 6s or later for better camera quality.
2. Computer: A Mac or Windows PC.
3. App: A third-party app that facilitates the connection between your iPhone and computer.
4. Cable: A USB cable to connect your iPhone to your computer (optional, depending on the app you choose).
5. Mount or Stand: To position your iPhone at the desired angle.
Step-by-Step Guide
1. Choose the Right App
Several apps can turn your iPhone into a webcam. Some popular options include:
- EpocCam: Available for both Mac and Windows, EpocCam offers wireless and wired connections. The free version provides basic functionality, while the paid version unlocks higher resolutions and additional features.
- iVCam: Another versatile option that supports both wireless and wired connections. It offers high-quality video and various customization options.
- DroidCam: Although primarily designed for Android, DroidCam also supports iOS devices. It offers both free and paid versions with varying features.
2. Install the App on Your iPhone and Computer
Once you've chosen an app, download and install it on both your iPhone and computer. Follow the on-screen instructions to complete the installation process.
3. Connect Your iPhone to Your Computer
Depending on the app, you can connect your iPhone to your computer either wirelessly or via a USB cable. For a wireless connection, ensure both devices are on the same Wi-Fi network. For a wired connection, simply plug your iPhone into your computer using a USB cable.
4. Configure the App Settings
Open the app on both your iPhone and computer. You may need to grant permissions for the app to access your camera and microphone. Adjust the settings to your preference, such as resolution, frame rate, and audio input.
5. Select Your iPhone as the Webcam Source
In your video conferencing or streaming software (e.g., Zoom, Skype, OBS), go to the settings and select your iPhone as the webcam source. The app you installed should appear as an option in the list of available cameras.
6. Position Your iPhone
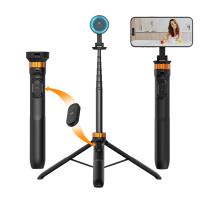
Use a mount or stand to position your iPhone at the desired angle. Ensure the camera is stable and at eye level for the best video quality. You can also use a tripod for more flexibility.
Tips for Optimal Performance
To ensure the best possible experience, consider the following tips:
- Lighting: Good lighting is crucial for high-quality video. Use natural light or invest in a ring light to illuminate your face evenly.
- Stability: A stable camera ensures a clear and professional appearance. Avoid holding your iPhone by hand, as this can result in shaky footage.
- Battery Life: If you're using a wireless connection, keep an eye on your iPhone's battery life. Consider plugging it in to avoid interruptions.
- Network Connection: For wireless connections, a strong and stable Wi-Fi network is essential to prevent lag and disconnections.
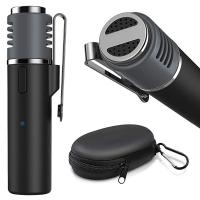
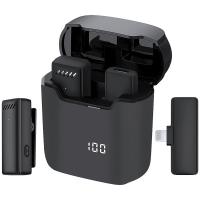
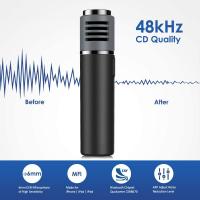
- Audio Quality: While your iPhone's microphone can suffice, using an external microphone can significantly improve audio quality.
Troubleshooting Common Issues
Despite the straightforward process, you may encounter some issues. Here are common problems and their solutions:
- Connection Issues: If your iPhone isn't connecting to your computer, ensure both devices are on the same Wi-Fi network or check the USB cable connection. Restarting both devices can also help.
- Low Video Quality: Adjust the app settings to increase the resolution and frame rate. Ensure good lighting and a stable camera position.
- Audio Problems: If the audio isn't working, check the app permissions and ensure the correct audio input is selected in your video conferencing software.
Alternatives and Advanced Options
If you're looking for more advanced features or alternatives, consider the following:
- Continuity Camera: For Mac users with macOS Mojave or later and an iPhone with iOS 12 or later, Apple's Continuity Camera feature allows you to use your iPhone's camera directly in apps like FaceTime and QuickTime.
- NDI HX Camera: This app allows you to use your iPhone as a high-quality NDI (Network Device Interface) camera, suitable for professional streaming setups.
- OBS Studio: For advanced users, OBS Studio offers extensive customization options for streaming and recording. You can use your iPhone as a source by adding it as a video capture device.
Using your iPhone as a webcam is a practical and cost-effective solution for achieving high-quality video communication. With the right app and setup, you can leverage your iPhone's superior camera capabilities for virtual meetings, streaming, and more. By following the steps outlined in this guide and considering the tips for optimal performance, you'll be well on your way to a professional and seamless video experience. Whether you're a remote worker, content creator, or someone who simply wants to stay connected, turning your iPhone into a webcam is a valuable skill in today's digital world.


