How To View Sd Card On Laptop?
Viewing an SD card on a laptop is a common task that many users need to perform for various reasons, such as transferring photos, videos, or other files. This article will guide you through the process of accessing and managing the contents of an SD card on your laptop. We will cover different methods, potential issues you might encounter, and solutions to those problems. By the end of this article, you should be able to confidently view and manage your SD card's contents on your laptop.
Understanding SD Cards and Their Types

Before diving into the steps, it's essential to understand the different types of SD cards available. SD cards come in various sizes and capacities, including:
1. Standard SD Cards: These are the original SD cards, typically up to 2GB in capacity.
2. SDHC (Secure Digital High Capacity): These cards range from 2GB to 32GB.
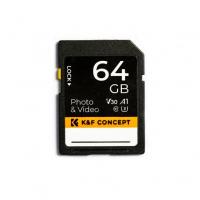
3. SDXC (Secure Digital Extended Capacity): These cards offer capacities from 32GB to 2TB.
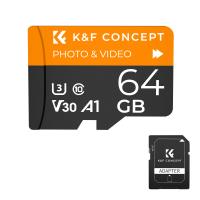
4. MicroSD Cards: These are smaller versions of SD cards and are commonly used in smartphones and other portable devices. They also come in SDHC and SDXC variants.
Method 1: Using the Built-in SD Card Slot

Many modern laptops come with a built-in SD card slot, making it easy to access the contents of your SD card. Here’s how to do it:
1. Insert the SD Card: Locate the SD card slot on your laptop. It is usually on the side or front of the laptop. Insert the SD card into the slot, ensuring it is properly oriented.
2. Access the SD Card: Once the SD card is inserted, your laptop should automatically recognize it. Open "File Explorer" (Windows) or "Finder" (Mac) to view the SD card. It will appear as a removable drive.
3. Browse and Manage Files: You can now browse the contents of the SD card, copy files to and from the card, and manage your data as needed.
Method 2: Using an External SD Card Reader
If your laptop does not have a built-in SD card slot, you can use an external SD card reader. These devices are inexpensive and widely available. Here’s how to use one:
1. Purchase an SD Card Reader: Ensure that the SD card reader is compatible with your SD card type (SD, SDHC, SDXC, or MicroSD).
2. Connect the SD Card Reader: Plug the SD card reader into a USB port on your laptop.
3. Insert the SD Card: Insert your SD card into the appropriate slot on the card reader.
4. Access the SD Card: Your laptop should recognize the SD card reader and the SD card. Open "File Explorer" (Windows) or "Finder" (Mac) to view the SD card as a removable drive.
5. Browse and Manage Files: You can now access and manage the files on your SD card.
Troubleshooting Common Issues

Sometimes, you may encounter issues when trying to view your SD card on a laptop. Here are some common problems and their solutions:
1. SD Card Not Recognized: If your laptop does not recognize the SD card, try the following steps:
- Ensure the SD card is properly inserted.
- Try a different SD card to rule out a faulty card.
- Update your laptop’s drivers, especially the USB and SD card reader drivers.
- Restart your laptop and try again.
2. Corrupted SD Card: If your SD card is corrupted, you may not be able to access its contents. You can try the following:
- Use a different device to check if the SD card is recognized.
- Use data recovery software to retrieve your files.
- Format the SD card (this will erase all data, so use it as a last resort).
3. Slow Transfer Speeds: If you experience slow transfer speeds, consider the following:
- Use a high-speed SD card (Class 10 or UHS-I/UHS-II).
- Ensure your SD card reader supports high-speed transfers.
- Close other applications that may be using system resources.
Formatting an SD Card
Formatting an SD card can help resolve issues and prepare the card for use. Here’s how to format an SD card on your laptop:
1. Backup Your Data: Formatting will erase all data on the SD card, so make sure to back up any important files.
2. Insert the SD Card: Insert the SD card into your laptop’s built-in slot or external card reader.
3. Open Disk Management: On Windows, right-click "This PC" and select "Manage," then go to "Disk Management." On Mac, open "Disk Utility."
4. Select the SD Card: Locate your SD card in the list of drives.
5. Format the SD Card: Right-click the SD card and select "Format." Choose the file system (FAT32 for SDHC, exFAT for SDXC) and click "Start" (Windows) or "Erase" (Mac).
Best Practices for Using SD Cards
To ensure the longevity and reliability of your SD cards, follow these best practices:
1. Safely Eject the SD Card: Always use the "Safely Remove Hardware" option (Windows) or "Eject" (Mac) before removing the SD card to prevent data corruption.
2. Avoid Physical Damage: Handle SD cards with care to avoid bending or breaking them.
3. Keep SD Cards Clean: Keep the contacts clean and free from dust and debris.
4. Regular Backups: Regularly back up the data on your SD card to prevent data loss.
Viewing and managing an SD card on your laptop is a straightforward process, whether you use a built-in SD card slot or an external card reader. By following the steps outlined in this article, you can easily access your SD card’s contents and troubleshoot any issues that may arise. Remember to handle your SD cards with care and follow best practices to ensure their longevity and reliability. With this knowledge, you can confidently manage your SD card data and make the most of your storage devices.

![4K digital camera for photography and video [autofocus and stabilisation] 48 MP video blog camera with SD card, 3 4K digital camera for photography and video [autofocus and stabilisation] 48 MP video blog camera with SD card, 3](https://img.kentfaith.com/cache/catalog/products/us/GW41.0065/GW41.0065-1-200x200.jpg)

