How Do You Build A Solar Panel?
Building a solar panel can be a rewarding and educational project that not only helps you understand the intricacies of renewable energy but also provides a practical solution for generating electricity. Whether you are a DIY enthusiast, a student, or someone interested in sustainable living, constructing your own solar panel can be a fulfilling endeavor. This article will guide you through the process, from understanding the basic components to assembling and testing your solar panel.
Understanding the Basics

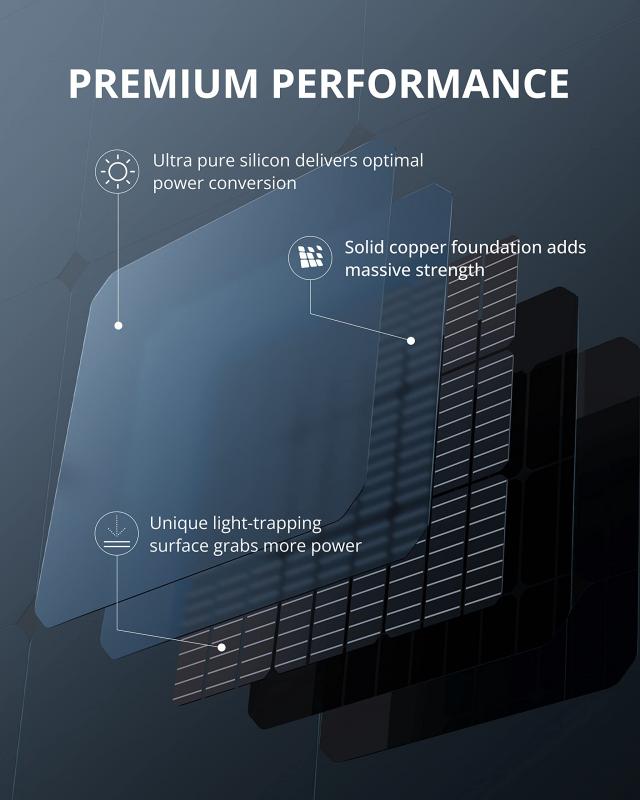
Before diving into the construction process, it’s essential to understand the basic components and principles behind solar panels. A solar panel consists of several photovoltaic (PV) cells that convert sunlight into electricity. These cells are made from semiconductor materials, typically silicon, which generate electric current when exposed to sunlight.
Key Components:

1. Photovoltaic Cells: The core component that converts sunlight into electricity.
2. Glass Sheet: Protects the PV cells and allows sunlight to pass through.
3. Encapsulation Material: Usually made of EVA (ethylene-vinyl acetate), it protects the cells from moisture and mechanical damage.
4. Backsheet: Provides additional protection and insulation.
5. Frame: Typically made of aluminum, it holds the entire panel together.
6. Junction Box: Houses the electrical connections and provides a point for external wiring.
Step-by-Step Guide to Building a Solar Panel

1. Gather Materials and Tools

To build a solar panel, you will need the following materials:
- Photovoltaic cells
- Glass sheet
- EVA encapsulation material
- Backsheet
- Aluminum frame
- Junction box
- Tabbing wire
- Bus wire
- Flux pen
- Soldering iron and solder
- Silicone sealant
Additionally, you will need tools such as a multimeter, wire cutters, and a heat gun.
2. Design the Layout
Determine the size and power output of your solar panel. This will depend on the number of PV cells you plan to use and their individual power ratings. For example, if you are using 36 cells, each rated at 0.5 volts, your panel will produce 18 volts.
Arrange the cells in a grid pattern on a flat surface. Ensure that the cells are evenly spaced and aligned correctly. This layout will help you visualize the final assembly and make the soldering process easier.
3. Solder the Cells
Soldering the cells together is a critical step in building a solar panel. Use tabbing wire to connect the cells in series. The tabbing wire should be soldered to the front (negative side) of one cell and the back (positive side) of the next cell. This series connection ensures that the voltage of each cell adds up.
Apply flux to the solder points to ensure a good connection and use a soldering iron to attach the tabbing wire. Be careful not to overheat the cells, as this can damage them.
4. Assemble the Panel
Once all the cells are soldered together, it’s time to assemble the panel. Place the glass sheet on a flat surface and lay the encapsulation material on top. Carefully position the soldered cells on the encapsulation material.
Cover the cells with another layer of encapsulation material and then place the backsheet on top. Use a heat gun to bond the encapsulation material, ensuring that the cells are securely sealed and protected.
5. Install the Frame
Attach the aluminum frame around the edges of the panel. The frame provides structural support and protects the edges of the glass and encapsulation material. Use silicone sealant to seal any gaps between the frame and the glass to prevent moisture from entering.
6. Connect the Junction Box
The junction box is where the electrical connections are made. Attach the bus wires from the cells to the terminals in the junction box. The junction box should have diodes to prevent reverse current flow, which can damage the cells.
Seal the junction box with silicone sealant to protect the connections from moisture and dust.
7. Test the Panel
Before installing your solar panel, it’s crucial to test its output. Use a multimeter to measure the voltage and current produced by the panel in sunlight. Compare the readings with the expected values based on the number of cells and their ratings.
If the output is lower than expected, check for any loose connections or damaged cells. Make any necessary repairs and retest the panel.
Practical Considerations
Building a solar panel requires precision and attention to detail. Here are some practical tips to ensure a successful project:
- Safety First: Always wear protective gear, such as gloves and safety glasses, when handling tools and materials.
- Quality Materials: Invest in high-quality PV cells and other components to ensure the longevity and efficiency of your solar panel.
- Proper Ventilation: Work in a well-ventilated area, especially when soldering, to avoid inhaling fumes.
- Weatherproofing: Ensure that all connections and components are adequately sealed to protect against weather conditions.
Benefits of Building Your Own Solar Panel
Constructing your own solar panel offers several benefits:
- Cost Savings: Building a solar panel can be more cost-effective than purchasing a pre-assembled one, especially for small-scale projects.
- Educational Experience: The process provides hands-on experience and a deeper understanding of how solar energy works.
- Customization: You can design and build a panel that meets your specific power needs and space constraints.
- Sustainability: By generating your own electricity, you reduce your reliance on fossil fuels and contribute to a more sustainable future.
Building a solar panel is a challenging yet rewarding project that combines technical skills with a commitment to sustainability. By following the steps outlined in this guide, you can create a functional solar panel that harnesses the power of the sun to generate electricity. Whether you are looking to power a small device or contribute to a larger renewable energy system, constructing your own solar panel is a valuable and impactful endeavor.

There are no comments for this blog.