How Do You Install Solar Panels?
Installing solar panels is a significant step towards sustainable living and energy independence. As more people become aware of the environmental and economic benefits of solar energy, the demand for solar panel installations has surged. This article will guide you through the process of installing solar panels, addressing common questions and concerns to ensure a smooth and efficient installation.
Understanding Solar Panel Installation
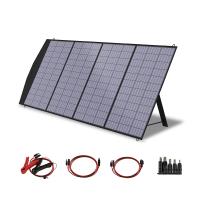
Before diving into the installation process, it's essential to understand the basic components and how they work together to generate electricity. A typical solar power system includes:
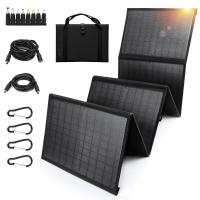
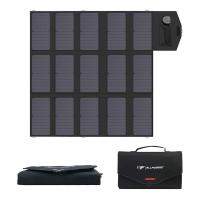
1. Solar Panels: These are the primary components that convert sunlight into electricity.
2. Inverter: This device converts the direct current (DC) produced by the solar panels into alternating current (AC), which is used by most household appliances.
3. Mounting System: This includes the racks and hardware used to secure the solar panels to your roof or ground.
4. Battery Storage (Optional): Batteries can store excess energy generated during the day for use at night or during power outages.
5. Monitoring System: This system tracks the performance of your solar panels and helps identify any issues.
Step-by-Step Guide to Installing Solar Panels
1. Assess Your Energy Needs

The first step in installing solar panels is to assess your energy needs. Review your electricity bills to determine your average monthly consumption. This information will help you decide the size of the solar power system you need.
2. Evaluate Your Property
Next, evaluate your property to determine the best location for the solar panels. Consider the following factors:
- Roof Condition: Ensure your roof is in good condition and can support the weight of the solar panels.
- Sunlight Exposure: The location should receive maximum sunlight throughout the day. South-facing roofs are typically ideal in the Northern Hemisphere.
- Shading: Avoid areas with significant shading from trees, buildings, or other obstructions.
3. Obtain Necessary Permits
Before installing solar panels, you must obtain the necessary permits from your local government or building authority. The requirements vary by location, so check with your local authorities to ensure compliance with all regulations.
4. Choose the Right Solar Panels and Inverter
Selecting the right solar panels and inverter is crucial for the efficiency and longevity of your solar power system. Consider the following factors:
- Efficiency: Higher efficiency panels generate more electricity in a smaller space.
- Durability: Look for panels with a long warranty and proven durability.
- Cost: Balance the cost with the efficiency and durability to find the best value.
5. Install the Mounting System
Once you have all the necessary components and permits, you can begin the installation process. Start by installing the mounting system. This involves:
- Marking the Location: Use a chalk line to mark the location of the mounting brackets on your roof.
- Attaching the Brackets: Secure the brackets to the roof rafters using lag bolts. Ensure they are evenly spaced and aligned.
- Installing the Rails: Attach the rails to the brackets, ensuring they are level and secure.
6. Install the Solar Panels
With the mounting system in place, you can now install the solar panels. Follow these steps:
- Position the Panels: Place the panels on the rails and secure them with clamps.
- Connect the Panels: Use the provided connectors to link the panels together in series or parallel, depending on your system design.
- Check the Connections: Ensure all connections are secure and weatherproof.
7. Install the Inverter and Electrical Components
Next, install the inverter and other electrical components. This involves:
- Mounting the Inverter: Choose a location close to your main electrical panel and mount the inverter on a wall or other suitable surface.
- Connecting the Inverter: Connect the solar panels to the inverter using the appropriate wiring.
- Connecting to the Electrical Panel: Run the wiring from the inverter to your main electrical panel and connect it to a dedicated circuit breaker.
8. Test the System
Before activating your solar power system, it's essential to test it to ensure everything is working correctly. Follow these steps:
- Check the Connections: Double-check all connections to ensure they are secure and properly insulated.
- Power On the System: Turn on the inverter and monitor the system to ensure it is generating electricity.
- Monitor Performance: Use the monitoring system to track the performance of your solar panels and identify any issues.
9. Schedule an Inspection
After testing the system, schedule an inspection with your local building authority. They will verify that the installation meets all safety and code requirements. Once the inspection is complete, you can activate your solar power system.
Maintenance and Monitoring
Regular maintenance and monitoring are essential to ensure the long-term performance of your solar power system. Here are some tips:
- Clean the Panels: Keep the panels clean and free of debris to maximize their efficiency.
- Inspect the System: Regularly inspect the mounting system, wiring, and inverter for any signs of wear or damage.
- Monitor Performance: Use the monitoring system to track the performance of your solar panels and address any issues promptly.
Installing solar panels is a rewarding investment that can significantly reduce your energy bills and carbon footprint. By following this step-by-step guide, you can ensure a successful installation and enjoy the benefits of solar energy for years to come. Remember to assess your energy needs, evaluate your property, obtain the necessary permits, choose the right components, and follow the installation process carefully. With proper maintenance and monitoring, your solar power system will provide clean, renewable energy for your home.


