How Does A Wifi Trail Camera Work?
In the age of digital technology, WiFi trail cameras have revolutionized the way we monitor wildlife, secure properties, and even conduct research. These devices combine the traditional functionality of trail cameras with the convenience of wireless connectivity, allowing users to access images and videos remotely. Understanding how a WiFi trail camera works can help you make the most of its features and capabilities. This article will delve into the mechanics, benefits, and practical applications of WiFi trail cameras, providing a comprehensive guide for both novices and seasoned users.
The Basics of WiFi Trail Cameras
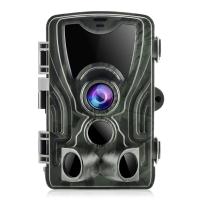
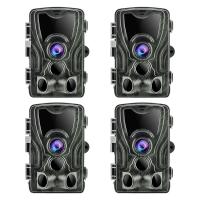
A WiFi trail camera is essentially a digital camera equipped with motion sensors and wireless connectivity. These cameras are designed to capture images or videos when motion is detected, and then transmit the data to a connected device via WiFi. Here’s a breakdown of the core components and their functions:
1. Camera Lens and Sensor: The camera lens captures the image, while the sensor determines the quality and resolution. Most WiFi trail cameras come with high-resolution sensors to ensure clear and detailed images.
2. Motion Detector: This is usually a Passive Infrared (PIR) sensor that detects heat and movement. When an animal or person passes within the sensor’s range, it triggers the camera to take a photo or record a video.
3. WiFi Module: The WiFi module enables the camera to connect to a wireless network. This allows for remote access to the camera’s data, enabling users to view images and videos in real-time or download them later.
4. Power Source: WiFi trail cameras are typically powered by batteries, though some models can be connected to external power sources. Battery life can vary depending on usage and the camera’s power-saving features.
5. Storage: Images and videos are usually stored on an SD card within the camera. Some models also offer cloud storage options, which can be particularly useful for accessing data remotely.
Setting Up a WiFi Trail Camera
Setting up a WiFi trail camera involves several steps, from choosing the right location to configuring the wireless settings. Here’s a step-by-step guide:
1. Choose the Location: Select a strategic location where you expect to capture activity. This could be a wildlife trail, a property entrance, or any area of interest. Ensure the camera is positioned at the right height and angle for optimal coverage.
2. Install the Camera: Mount the camera securely using straps or brackets. Make sure it is stable and protected from the elements. Some cameras come with camouflage designs to blend into the surroundings.
3. Power Up: Insert the batteries or connect the camera to an external power source. Ensure the power supply is reliable to avoid interruptions in monitoring.
4. Connect to WiFi: Follow the manufacturer’s instructions to connect the camera to your WiFi network. This usually involves using a smartphone app or a computer to enter the network credentials.
5. Configure Settings: Adjust the camera settings according to your needs. This includes setting the resolution, motion sensitivity, and the interval between shots. Some cameras also allow you to set up notifications for when motion is detected.
6. Test the Camera: Before leaving the camera to operate independently, test it to ensure it is capturing images and videos correctly and that the WiFi connection is stable.
Benefits of WiFi Trail Cameras
WiFi trail cameras offer several advantages over traditional trail cameras, making them a popular choice for various applications:
1. Remote Access: The ability to access images and videos remotely is perhaps the most significant benefit. This means you can monitor activity in real-time without having to physically retrieve the SD card.
2. Instant Notifications: Many WiFi trail cameras can send instant notifications to your smartphone or email when motion is detected. This feature is particularly useful for security purposes.
3. Ease of Use: Modern WiFi trail cameras are designed to be user-friendly, with intuitive apps and interfaces that make setup and operation straightforward.
4. Versatility: These cameras can be used for a wide range of applications, from wildlife monitoring and research to property surveillance and even outdoor photography.
5. Data Management: With cloud storage options, managing and organizing your data becomes much easier. You can access your images and videos from anywhere, and there’s no risk of losing data due to a damaged or lost SD card.
Practical Applications of WiFi Trail Cameras
WiFi trail cameras are incredibly versatile and can be used in various scenarios. Here are some practical applications:
1. Wildlife Monitoring: Researchers and wildlife enthusiasts use WiFi trail cameras to study animal behavior, track movements, and monitor populations. The remote access feature allows for minimal human disturbance, which is crucial for accurate data collection.
2. Property Surveillance: Homeowners and businesses use these cameras for security purposes. They can monitor entrances, driveways, and other critical areas, receiving instant alerts if any suspicious activity is detected.
3. Hunting: Hunters use WiFi trail cameras to scout game trails and feeding areas. The real-time access to images helps in planning hunting trips more effectively.
4. Outdoor Photography: Photographers use these cameras to capture stunning images of wildlife and nature. The ability to control the camera remotely allows for creative and unique shots.
5. Environmental Research: Scientists use WiFi trail cameras to monitor environmental changes, study ecosystems, and gather data for conservation efforts.
Challenges and Considerations
While WiFi trail cameras offer numerous benefits, there are also some challenges and considerations to keep in mind:
1. WiFi Range: The effectiveness of a WiFi trail camera depends on the strength and range of the WiFi signal. In remote areas, this can be a significant limitation. Some cameras offer cellular connectivity as an alternative.
2. Battery Life: WiFi modules can drain the battery faster than traditional trail cameras. It’s essential to choose a camera with good battery life or consider using external power sources.
3. Data Security: As with any connected device, data security is a concern. Ensure that your camera’s firmware is up-to-date and use strong passwords to protect your data.
4. Cost: WiFi trail cameras tend to be more expensive than their non-WiFi counterparts. However, the added convenience and features often justify the higher price.
WiFi trail cameras represent a significant advancement in monitoring technology, offering unparalleled convenience and functionality. Whether you’re a wildlife researcher, a property owner, or an outdoor enthusiast, these cameras can provide valuable insights and enhance your monitoring capabilities. By understanding how they work and considering the practical applications and challenges, you can make an informed decision and get the most out of your WiFi trail camera.




There are no comments for this blog.