How To Clean Headphone Plug?
Cleaning a headphone plug is a task that many people overlook, but it is essential for maintaining the quality of your audio experience. Over time, dirt, dust, and grime can accumulate on the plug, leading to poor sound quality or even complete failure of the headphones. In this article, we will explore various methods to clean a headphone plug effectively, ensuring that your headphones continue to deliver the best possible sound.
Understanding the Importance of Cleaning a Headphone Plug
Before diving into the cleaning methods, it's crucial to understand why cleaning a headphone plug is important. The headphone plug, also known as the jack, is the part that connects your headphones to your device. When it gets dirty, the connection can become compromised, leading to static, reduced sound quality, or no sound at all. Regular cleaning can prevent these issues and extend the life of your headphones.
Tools and Materials Needed
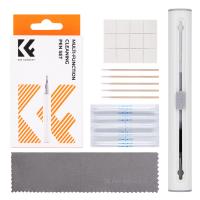
To clean a headphone plug, you will need the following tools and materials:
1. Isopropyl Alcohol (70% or higher): This is a powerful cleaning agent that evaporates quickly, making it ideal for cleaning electronic components.
2. Cotton Swabs: These are perfect for reaching into small spaces and applying the cleaning solution.
3. Microfiber Cloth: This will help in wiping down the plug without leaving any lint behind.
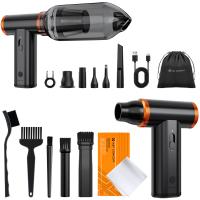
4. Compressed Air: This can be used to blow away any loose debris before and after cleaning.
5. Toothpick or Small Brush: These can help in removing stubborn dirt from the crevices.
Step-by-Step Cleaning Process
Step 1: Power Off and Unplug

Before you start cleaning, make sure to power off your device and unplug the headphones. This is crucial to avoid any electrical damage or short circuits.
Step 2: Initial Inspection
Take a close look at the headphone plug to identify any visible dirt or grime. This will help you focus your cleaning efforts on the most affected areas.
Step 3: Use Compressed Air
Use a can of compressed air to blow away any loose debris from the headphone plug. Hold the can upright and spray short bursts of air around the plug. This will help in removing any surface dust and make the cleaning process more effective.
Step 4: Apply Isopropyl Alcohol
Dip a cotton swab into the isopropyl alcohol and gently shake off any excess liquid. You don't want the swab to be dripping wet, as too much liquid can seep into the plug and cause damage.
Step 5: Clean the Plug
Gently rub the cotton swab around the headphone plug, focusing on any areas with visible dirt. Rotate the swab to use a clean section as you go. If the swab becomes too dirty, replace it with a new one.
Step 6: Use a Toothpick or Small Brush
For any stubborn dirt that the cotton swab couldn't remove, use a toothpick or a small brush. Be very gentle to avoid scratching the metal surface of the plug. You can also dip the brush in isopropyl alcohol for better cleaning.
Step 7: Wipe Down with Microfiber Cloth
After cleaning with the cotton swab and toothpick, use a microfiber cloth to wipe down the headphone plug. This will remove any remaining residue and leave the plug looking clean and shiny.
Step 8: Final Inspection
Inspect the headphone plug again to ensure that all dirt and grime have been removed. If necessary, repeat the cleaning process until the plug is completely clean.
Step 9: Let it Dry
Allow the headphone plug to air dry for a few minutes before plugging it back into your device. Isopropyl alcohol evaporates quickly, but it's always a good idea to give it some extra time to ensure that no moisture remains.
Additional Tips for Maintaining a Clean Headphone Plug
1. Regular Cleaning: Make it a habit to clean your headphone plug regularly, especially if you use your headphones frequently. This will prevent dirt from building up and becoming harder to remove.
2. Proper Storage: When not in use, store your headphones in a clean, dry place. Avoid leaving them in dusty or dirty environments.
3. Avoid Moisture: Keep your headphones and plug away from moisture. Water and electronics don't mix well, and moisture can lead to corrosion and damage.
4. Use a Protective Case: Consider using a protective case for your headphones. This will not only keep the plug clean but also protect the headphones from physical damage.
Troubleshooting Common Issues
Even with regular cleaning, you may encounter some common issues with your headphone plug. Here are a few troubleshooting tips:
1. Static or Crackling Sound: If you hear static or crackling sounds, it could be due to a loose connection. Make sure the plug is fully inserted into the jack. If the problem persists, try cleaning the jack on your device as well.
2. No Sound: If there's no sound coming from your headphones, check if the plug is damaged. Look for any visible signs of wear and tear. If the plug is damaged, you may need to replace the headphones.
3. Intermittent Sound: If the sound cuts in and out, it could be due to a dirty or damaged plug. Try cleaning the plug thoroughly. If the issue continues, the problem might be with the internal wiring of the headphones.
Cleaning a headphone plug is a simple yet essential task that can significantly improve your audio experience. By following the steps outlined in this article, you can ensure that your headphone plug remains clean and functional. Regular maintenance and proper storage will help extend the life of your headphones and keep them performing at their best. So, take a few minutes to clean your headphone plug today and enjoy crystal-clear sound quality every time you listen to your favorite music or podcasts.


