How To Format Right Protected Sd Card?
Formatting a write-protected SD card can be a challenging task, especially for those who are not familiar with the intricacies of data storage devices. Write protection is a feature that prevents data from being modified or deleted, which can be useful for safeguarding important information. However, it can also be a hindrance when you need to format the card for new use. In this article, we will explore various methods to format a write-protected SD card, addressing common issues and providing practical solutions.
Understanding Write Protection
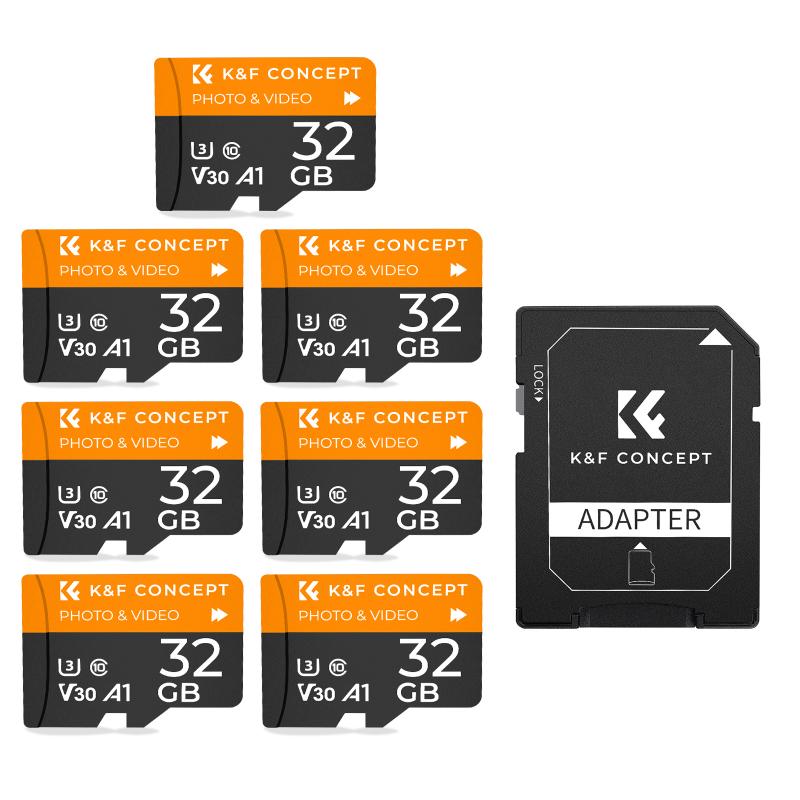
Before diving into the methods of formatting, it is essential to understand what write protection is and why it exists. Write protection can be enabled through a physical switch on the SD card or through software settings. The physical switch is usually a small tab located on the side of the card, which can be toggled to enable or disable write protection. Software write protection, on the other hand, is implemented through the file system and operating system settings.
Common Reasons for Write Protection

1. Physical Lock Switch: The most common reason for write protection is the physical lock switch on the SD card. When this switch is in the "Lock" position, the card becomes write-protected.
2. File System Errors: Corrupted file systems can sometimes cause the SD card to become write-protected.
3. Registry Settings: In some cases, the Windows registry settings can cause write protection.
4. Third-Party Software: Some third-party software applications can enable write protection to prevent data modification.
Methods to Format a Write-Protected SD Card

1. Check the Physical Lock Switch

The first and simplest step is to check the physical lock switch on the SD card. Ensure that the switch is in the "Unlock" position. If the switch is broken or loose, you may need to use a small piece of tape to hold it in the "Unlock" position temporarily.
2. Use Diskpart Utility (Windows)
Diskpart is a powerful command-line utility in Windows that can be used to manage disk partitions, including removing write protection.
1. Open Command Prompt: Press `Win + R`, type `cmd`, and press `Enter`.
2. Launch Diskpart: Type `diskpart` and press `Enter`.
3. List Disks: Type `list disk` and press `Enter` to display all connected disks.
4. Select Disk: Identify your SD card from the list and type `select disk X` (replace X with the disk number of your SD card) and press `Enter`.
5. Clear Read-Only Attribute: Type `attributes disk clear readonly` and press `Enter`.
6. Format the SD Card: Type `clean`, press `Enter`, then type `create partition primary`, press `Enter`, and finally type `format fs=fat32` (or `ntfs` if you prefer) and press `Enter`.
3. Modify Registry Settings (Windows)
If the Diskpart method does not work, you can try modifying the registry settings.
1. Open Registry Editor: Press `Win + R`, type `regedit`, and press `Enter`.
2. Navigate to StorageDevicePolicies: Go to `HKEY_LOCAL_MACHINE\SYSTEM\CurrentControlSet\Control\StorageDevicePolicies`.
3. Modify WriteProtect Value: Double-click on the `WriteProtect` key and set its value to `0`.
4. Restart Your Computer: Restart your computer to apply the changes.
4. Use SD Card Formatter (Mac and Windows)
The SD Association provides a dedicated SD Card Formatter tool that can be used to format SD cards, including those that are write-protected.
1. Download and Install: Download the SD Card Formatter tool from the SD Association's website and install it on your computer.
2. Run the Tool: Open the SD Card Formatter tool.
3. Select the SD Card: Choose your SD card from the list of available drives.
4. Format the Card: Click on the `Format` button to start the formatting process.
5. Use Disk Utility (Mac)
For Mac users, Disk Utility is a built-in tool that can be used to format SD cards.
1. Open Disk Utility: Go to `Applications > Utilities > Disk Utility`.
2. Select the SD Card: Choose your SD card from the list of available drives.
3. Erase the Card: Click on the `Erase` button, choose the desired file system (e.g., `MS-DOS (FAT)` or `ExFAT`), and click `Erase` to format the card.
6. Use Third-Party Software
Several third-party software applications can help you format a write-protected SD card. Some popular options include:
1. EaseUS Partition Master: A comprehensive disk management tool that can remove write protection and format SD cards.
2. MiniTool Partition Wizard: Another powerful disk management tool that offers similar functionality.
Troubleshooting Tips
- Check for Physical Damage: If your SD card is physically damaged, it may not be possible to remove write protection or format the card.
- Try a Different Card Reader: Sometimes, the issue may lie with the card reader rather than the SD card itself. Try using a different card reader to see if the problem persists.
- Update Drivers: Ensure that your computer's drivers are up to date, as outdated drivers can sometimes cause issues with SD card recognition and formatting.
Formatting a write-protected SD card can be a daunting task, but with the right tools and methods, it is entirely possible. By following the steps outlined in this article, you can successfully remove write protection and format your SD card for new use. Whether you are using Windows or Mac, there are multiple solutions available to address this common issue. Remember to back up any important data before attempting to format the card, as the process will erase all existing data. With a bit of patience and persistence, you can overcome the challenges of write protection and make the most of your SD card.




![4K digital camera for photography and video [autofocus and stabilisation] 48 MP video blog camera with SD card, 3 4K digital camera for photography and video [autofocus and stabilisation] 48 MP video blog camera with SD card, 3](https://img.kentfaith.com/cache/catalog/products/us/GW41.0065/GW41.0065-1-200x200.jpg)


