How To Mount Solar Panels On Rv Roof?
Mounting solar panels on an RV roof is a practical and increasingly popular way to ensure a reliable source of power while on the road. This process, while straightforward, requires careful planning and execution to ensure both the efficiency of the solar panels and the safety of the RV. In this article, we will walk you through the essential steps and considerations for mounting solar panels on your RV roof, addressing common questions and potential challenges along the way.
Understanding Your Power Needs
Before you begin the installation process, it’s crucial to understand your power needs. Calculate the total wattage you require by listing all the electrical devices you plan to use and their respective power consumption. This will help you determine the number and size of solar panels you need. For instance, if your daily power consumption is around 600 watt-hours, you might need a 200-watt solar panel system, assuming an average of 3 hours of peak sunlight per day.
Choosing the Right Solar Panels
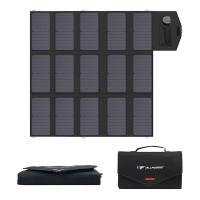
There are several types of solar panels available, but the most common for RVs are monocrystalline and polycrystalline panels. Monocrystalline panels are more efficient and take up less space, making them ideal for RV roofs where space is limited. Polycrystalline panels are generally less expensive but also less efficient. Consider the space available on your RV roof and your budget when making your choice.
Gathering Necessary Tools and Materials
To mount solar panels on your RV roof, you will need the following tools and materials:
- Solar panels
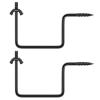
- Mounting brackets
- Drill and drill bits
- Screws and bolts
- Sealant (preferably a UV-resistant type)
- Wiring (including connectors and fuses)
- Charge controller
- Inverter (if you plan to use AC appliances)
- Battery bank (for storing solar energy)
Planning the Layout
Carefully plan the layout of your solar panels on the RV roof. Ensure that the panels will not be shaded by roof vents, air conditioners, or other obstructions. Shading can significantly reduce the efficiency of your solar panels. Use a measuring tape to mark the positions where the panels will be mounted, ensuring they are evenly spaced and aligned.
Installing the Mounting Brackets
Mounting brackets are essential for securing the solar panels to the RV roof. Follow these steps to install the brackets:
1. Position the Brackets: Place the brackets at the marked positions on the roof. Ensure they are aligned with the mounting holes on the solar panels.
2. Drill Holes: Use a drill to create holes for the screws. Be cautious not to drill too deep to avoid damaging the roof.
3. Apply Sealant: Apply a generous amount of sealant around the holes to prevent water leakage.
4. Secure the Brackets: Attach the brackets to the roof using screws and bolts. Tighten them securely to ensure the panels will remain stable during travel.
Mounting the Solar Panels
Once the brackets are in place, you can mount the solar panels:
1. Align the Panels: Position the solar panels on the brackets, ensuring they are properly aligned with the mounting holes.
2. Secure the Panels: Use bolts and nuts to attach the panels to the brackets. Tighten them securely to prevent any movement.
3. Check Stability: Ensure the panels are firmly attached and do not wobble. This is crucial for both safety and efficiency.
Wiring the Solar Panels
Proper wiring is essential for the efficient operation of your solar panel system. Follow these steps to wire the panels:
1. Connect the Panels: Use connectors to link the solar panels in series or parallel, depending on your system design. Series connections increase voltage, while parallel connections increase current.
2. Run the Wires: Route the wires from the panels to the charge controller. Use cable ties to secure the wires and prevent them from flapping in the wind.
3. Install the Charge Controller: Mount the charge controller inside the RV, close to the battery bank. Connect the wires from the solar panels to the charge controller.
4. Connect to the Battery Bank: Run wires from the charge controller to the battery bank. Ensure the connections are secure and properly insulated.
5. Install the Inverter: If you plan to use AC appliances, install an inverter and connect it to the battery bank.
Testing the System
After completing the installation, it’s essential to test the system to ensure everything is working correctly:
1. Check Connections: Verify that all connections are secure and properly insulated.
2. Monitor the Charge Controller: Turn on the charge controller and check the input from the solar panels. Ensure it is receiving power and charging the batteries.
3. Test the Inverter: If you have an inverter, turn it on and test it with an AC appliance to ensure it is functioning correctly.
Maintenance and Troubleshooting
Regular maintenance is crucial to keep your solar panel system operating efficiently:
- Clean the Panels: Dust and debris can reduce the efficiency of your solar panels. Clean them regularly with a soft cloth and mild detergent.
- Inspect Connections: Periodically check all connections for signs of wear or corrosion. Tighten any loose connections and replace damaged wires.
- Monitor Performance: Keep an eye on the performance of your system. If you notice a drop in efficiency, troubleshoot the system to identify and resolve any issues.
Mounting solar panels on your RV roof is a rewarding project that can provide you with a reliable source of power while on the road. By carefully planning the installation, choosing the right components, and following the steps outlined in this article, you can ensure a successful and efficient solar panel system. Regular maintenance and monitoring will help you get the most out of your investment, allowing you to enjoy the freedom and convenience of solar power during your travels.

