How To Record Audio On My Computer?
Recording audio on your computer can be a straightforward process, but it can also vary depending on the operating system and the specific requirements you have for the audio quality and format. Whether you are a podcaster, a musician, or someone who needs to record a simple voice memo, understanding the different methods and tools available can help you achieve the best results. In this article, we will explore various ways to record audio on your computer, covering both built-in tools and third-party software, as well as tips for optimizing your recordings.
Built-in Tools for Audio Recording
Windows Voice Recorder
For Windows users, the built-in Voice Recorder app is a simple and effective tool for basic audio recording tasks. Here’s how to use it:
1. Open Voice Recorder: You can find it by typing "Voice Recorder" in the search bar next to the Start menu.
2. Start Recording: Click on the microphone icon to start recording. You can pause and resume the recording as needed.
3. Save and Edit: Once you’re done, click the stop button. The recording will be saved automatically, and you can trim the audio if necessary.
macOS Voice Memos

Mac users have a similar built-in tool called Voice Memos. Here’s how to use it:
1. Open Voice Memos: You can find it in the Applications folder or by using Spotlight search.
2. Start Recording: Click the red record button to start. You can pause and resume as needed.
3. Save and Edit: Click the done button to stop recording. You can then edit the recording by trimming or adding notes.
Third-Party Software

While built-in tools are convenient, they may not offer the advanced features required for professional-quality recordings. Here are some popular third-party software options:
Audacity
Audacity is a free, open-source audio recording and editing software that is available for Windows, macOS, and Linux. It offers a wide range of features, making it suitable for both beginners and advanced users.
1. Download and Install: Visit the Audacity website and download the appropriate version for your operating system.
2. Set Up: Open Audacity and configure your audio input by selecting your microphone from the drop-down menu.
3. Start Recording: Click the red record button to start. You can use the pause and stop buttons as needed.
4. Edit and Export: Audacity offers a variety of editing tools, including cut, copy, paste, and effects. Once you’re satisfied with your recording, you can export it in various formats such as MP3, WAV, or OGG.
GarageBand
GarageBand is a powerful audio recording and editing software available exclusively for macOS and iOS users. It is particularly popular among musicians but is versatile enough for other types of recordings as well.
1. Open GarageBand: You can find it in the Applications folder.
2. Create a New Project: Choose a template that suits your needs, such as "Voice" for simple recordings or "Songwriter" for music.
3. Set Up Your Microphone: Select your audio input device from the preferences menu.
4. Start Recording: Click the record button to begin. You can use multiple tracks for different audio sources.
5. Edit and Export: GarageBand offers extensive editing tools and effects. Once you’re done, you can export your project in various formats.
Tips for Optimizing Your Recordings
Regardless of the tool you use, here are some tips to help you achieve the best possible audio quality:
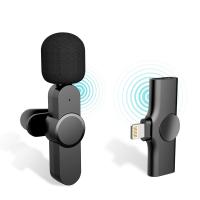
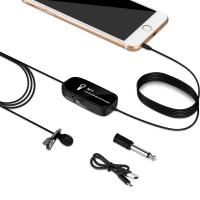
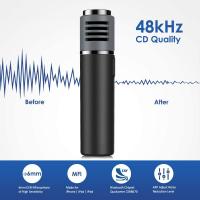
1. Use a Quality Microphone: Built-in microphones on laptops and desktops are generally not of high quality. Investing in a good external microphone can make a significant difference.
2. Choose a Quiet Environment: Background noise can ruin an otherwise good recording. Try to record in a quiet room and use soundproofing materials if necessary.
3. Adjust Input Levels: Make sure your microphone input levels are set correctly to avoid distortion or low volume issues.
4. Use Pop Filters and Windshields: These accessories can help reduce unwanted noise from plosives (like "p" and "b" sounds) and wind.
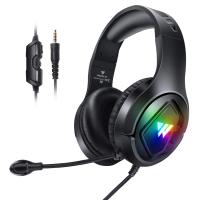
5. Monitor Your Recording: Use headphones to monitor your recording in real-time. This allows you to catch and correct issues as they occur.
Advanced Techniques
For those looking to take their recordings to the next level, here are some advanced techniques:
Multi-Track Recording
Multi-track recording allows you to record multiple audio sources separately and then mix them together. This is particularly useful for music production, podcasts with multiple hosts, or any project that requires layering different sounds.
1. Set Up Multiple Tracks: In software like Audacity or GarageBand, you can create multiple tracks and assign different input sources to each.
2. Record Separately: Record each audio source separately to ensure clarity and control over each track.
3. Mix and Edit: Use the software’s mixing tools to balance the levels, add effects, and create a cohesive final product.
Using Audio Interfaces
An audio interface is a hardware device that improves the quality of your recordings by providing better preamps and converters than those built into your computer.
1. Choose an Audio Interface: There are many options available, ranging from budget-friendly to professional-grade.
2. Connect Your Microphone: Plug your microphone into the audio interface, and then connect the interface to your computer via USB or Thunderbolt.
3. Configure Your Software: Set your recording software to use the audio interface as the input device.
Recording audio on your computer can be as simple or as complex as you need it to be. Whether you’re using built-in tools like Windows Voice Recorder and macOS Voice Memos, or advanced software like Audacity and GarageBand, there are plenty of options to suit your needs. By following the tips and techniques outlined in this article, you can ensure that your recordings are of the highest quality. Investing in good equipment, choosing the right environment, and using the appropriate software will help you achieve professional results, whether you’re recording a podcast, a song, or a simple voice memo.

