How To Record Your Screen With Audio?
Recording your screen with audio has become an essential skill in today's digital age. Whether you're creating tutorials, recording gameplay, or capturing a video call, knowing how to effectively record your screen with audio can be incredibly useful. This article will guide you through the various methods and tools available for screen recording with audio on different platforms, including Windows, macOS, and mobile devices. We'll also cover some best practices to ensure your recordings are of high quality.
Understanding the Basics
Before diving into the specific tools and methods, it's important to understand the basics of screen recording and audio capture. Screen recording involves capturing the visual output of your computer or mobile device, while audio capture involves recording sound from your system, microphone, or both. The combination of these two elements allows you to create comprehensive and engaging content.
Tools for Screen Recording with Audio
Windows
1. OBS Studio
- Overview: OBS Studio is a free, open-source software that offers powerful screen recording and live streaming capabilities.
- Features: It supports multiple audio sources, including system audio and microphone input. You can also customize the recording area and add overlays.
- How to Use:
1. Download and install OBS Studio from the official website.
2. Open OBS Studio and create a new scene.
3. Add a new source by clicking the "+" button and selecting "Display Capture" for screen recording.
4. Add an audio source by clicking the "+" button and selecting "Audio Input Capture" for microphone input or "Audio Output Capture" for system audio.
5. Adjust the audio levels in the mixer to ensure balanced sound.
6. Click "Start Recording" to begin capturing your screen and audio.
2. Xbox Game Bar
- Overview: Xbox Game Bar is a built-in feature in Windows 10 and later versions that allows you to record your screen and audio.
- Features: It is user-friendly and does not require additional software installation. It supports both system audio and microphone input.
- How to Use:
1. Press `Win + G` to open the Xbox Game Bar.
2. Click the "Capture" button to open the capture widget.
3. Click the microphone icon to enable or disable microphone recording.
4. Click the "Start Recording" button to begin capturing your screen and audio.
macOS
1. QuickTime Player
- Overview: QuickTime Player is a built-in application on macOS that offers basic screen recording and audio capture capabilities.
- Features: It supports recording the entire screen or a selected portion, and you can choose to record audio from your microphone.
- How to Use:
1. Open QuickTime Player and go to `File > New Screen Recording`.
2. Click the drop-down arrow next to the record button to select your audio source (e.g., internal microphone).
3. Click the record button to start recording your screen and audio.
4. Click the stop button in the menu bar to end the recording.
2. ScreenFlow
- Overview: ScreenFlow is a professional screen recording and video editing software for macOS.
- Features: It offers advanced features such as multi-track editing, annotations, and transitions. It supports recording system audio, microphone input, and webcam.
- How to Use:
1. Download and install ScreenFlow from the official website.
2. Open ScreenFlow and create a new recording.
3. Select the screen area you want to record and choose your audio sources (system audio and/or microphone).
4. Click the record button to start capturing your screen and audio.
5. Use the built-in editor to enhance your recording with annotations, transitions, and other effects.
Mobile Devices
1. iOS (iPhone/iPad)
- Built-in Screen Recording:
- Overview: iOS devices come with a built-in screen recording feature that allows you to capture your screen and audio.
- How to Use:
1. Go to `Settings > Control Center > Customize Controls` and add "Screen Recording" to your Control Center.
2. Open the Control Center by swiping down from the top-right corner of the screen (iPhone X and later) or up from the bottom (iPhone 8 and earlier).
3. Press and hold the screen recording button to access audio options.
4. Tap the microphone icon to enable microphone audio.
5. Tap "Start Recording" to begin capturing your screen and audio.
2. Android
- Built-in Screen Recording (Android 11 and later):
- Overview: Android 11 and later versions include a built-in screen recording feature.
- How to Use:
1. Swipe down from the top of the screen to open the Quick Settings panel.
2. Tap the screen recording icon.
3. Select your audio source (microphone, device audio, or both).
4. Tap "Start" to begin recording your screen and audio.
- Third-Party Apps:
- AZ Screen Recorder:
- Overview: AZ Screen Recorder is a popular third-party app for screen recording on Android devices.
- How to Use:
1. Download and install AZ Screen Recorder from the Google Play Store.
2. Open the app and grant the necessary permissions.
3. Tap the record button to start capturing your screen and audio.
4. Use the floating toolbar to control the recording.
Best Practices for High-Quality Recordings
1. Plan Your Content: Before you start recording, outline what you want to cover. This will help you stay organized and ensure you don't miss any important points.
2. Check Your Audio Levels: Make sure your audio levels are balanced. Test your microphone and system audio to avoid any distortions or background noise.
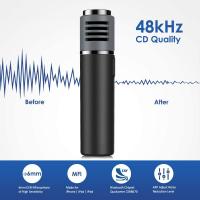
3. Use a Good Microphone: If possible, use an external microphone for better audio quality. Built-in microphones can pick up unwanted noise and may not provide the best sound clarity.
4. Record in a Quiet Environment: Find a quiet place to record to minimize background noise. Turn off any fans, air conditioners, or other noisy appliances.
5. Edit Your Recording: Use video editing software to trim any unnecessary parts, add annotations, and enhance the overall quality of your recording.
6. Save in High Quality: Choose a high-quality format for saving your recordings. Common formats include MP4, MOV, and AVI.
Recording your screen with audio is a valuable skill that can be used for various purposes, from creating tutorials to capturing important moments during video calls. By understanding the basics and using the right tools, you can create high-quality recordings that effectively convey your message. Whether you're using Windows, macOS, or a mobile device, there are plenty of options available to suit your needs. Follow the best practices outlined in this article to ensure your recordings are clear, professional, and engaging. Happy recording!




There are no comments for this blog.