How To Use Microphone On Macbook?
Using a microphone on a MacBook can be a straightforward process, but it can also come with its own set of challenges, especially for those who are not tech-savvy. Whether you are using the built-in microphone or an external one, understanding how to set it up and troubleshoot common issues is essential. This article will guide you through the steps to effectively use a microphone on your MacBook, covering both built-in and external microphones, as well as providing solutions to common problems.
Understanding the Built-in Microphone

MacBooks come with a built-in microphone that is generally sufficient for basic tasks such as video calls, voice memos, and casual recording. Here’s how to ensure it’s set up correctly:
1. Access System Preferences: Click on the Apple logo in the top-left corner of your screen and select "System Preferences."
2. Select Sound: In the System Preferences window, click on "Sound."
3. Input Tab: Navigate to the "Input" tab to see a list of available microphones.
4. Select Internal Microphone: Ensure that "Internal Microphone" is selected. You can also adjust the input volume using the slider below.
Using an External Microphone

For higher quality audio, you might want to use an external microphone. Here’s how to set it up:
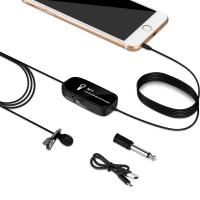
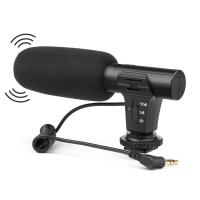
1. Connect the Microphone: Plug your external microphone into the appropriate port on your MacBook. This could be a USB port, a 3.5mm audio jack, or a Thunderbolt port, depending on the microphone.
2. System Preferences: Go to "System Preferences" and then "Sound."
3. Input Tab: In the "Input" tab, select your external microphone from the list of available devices.
4. Adjust Input Volume: Use the slider to adjust the input volume to an appropriate level.
Troubleshooting Common Issues
Even with the correct setup, you might encounter some issues. Here are some common problems and their solutions:
Microphone Not Detected
1. Check Connections: Ensure that your external microphone is properly connected to your MacBook.
2. Restart Your MacBook: Sometimes, a simple restart can resolve detection issues.
3. Update macOS: Make sure your operating system is up to date, as updates often include fixes for hardware compatibility issues.
4. Check Permissions: Go to "System Preferences" > "Security & Privacy" > "Privacy" tab. Ensure that the app you are using has permission to access the microphone.
Poor Audio Quality
1. Adjust Input Volume: Go to "System Preferences" > "Sound" > "Input" and adjust the input volume.
2. Reduce Background Noise: Ensure you are in a quiet environment. You can also use software to reduce background noise.
3. Check Microphone Placement: Make sure the microphone is positioned correctly and not obstructed.
Echo or Feedback
1. Use Headphones: If you are experiencing echo or feedback, using headphones can often resolve the issue.
2. Adjust Sound Settings: Go to "System Preferences" > "Sound" and experiment with the input and output settings to find a balance that minimizes echo.
Advanced Settings and Tips
For those who need more control over their audio settings, macOS offers some advanced options:
1. Audio MIDI Setup: This utility allows you to configure audio input and output devices in more detail. You can find it in the "Utilities" folder within "Applications."
2. Third-Party Software: Applications like Audacity, GarageBand, and Logic Pro offer advanced audio recording and editing features. These can be particularly useful for podcasters, musicians, and other professionals.
3. External Audio Interfaces: For the highest quality audio, consider using an external audio interface. These devices offer superior preamps and converters, providing better sound quality than the built-in options.
Using Microphones with Specific Applications
Different applications may have their own settings for microphone use. Here’s how to configure some popular ones:
Zoom
1. Open Zoom: Launch the Zoom application.
2. Settings: Click on your profile picture and select "Settings."
3. Audio: Go to the "Audio" tab and select your microphone from the "Microphone" dropdown menu. You can also test your microphone here.
Skype
1. Open Skype: Launch the Skype application.
2. Settings: Click on your profile picture and select "Settings."
3. Audio & Video: Go to the "Audio & Video" tab and select your microphone from the "Microphone" dropdown menu.
GarageBand
1. Open GarageBand: Launch the GarageBand application.
2. Preferences: Go to "GarageBand" > "Preferences" > "Audio/MIDI."
3. Input Device: Select your microphone from the "Input Device" dropdown menu.
Using a microphone on a MacBook, whether built-in or external, can significantly enhance your audio experience for various applications. By following the steps outlined in this article, you can ensure that your microphone is set up correctly and troubleshoot any issues that may arise. From basic settings in System Preferences to advanced configurations in Audio MIDI Setup, macOS provides a range of options to meet your audio needs. Whether you are a casual user or a professional, understanding these settings will help you get the most out of your microphone on a MacBook.






There are no comments for this blog.